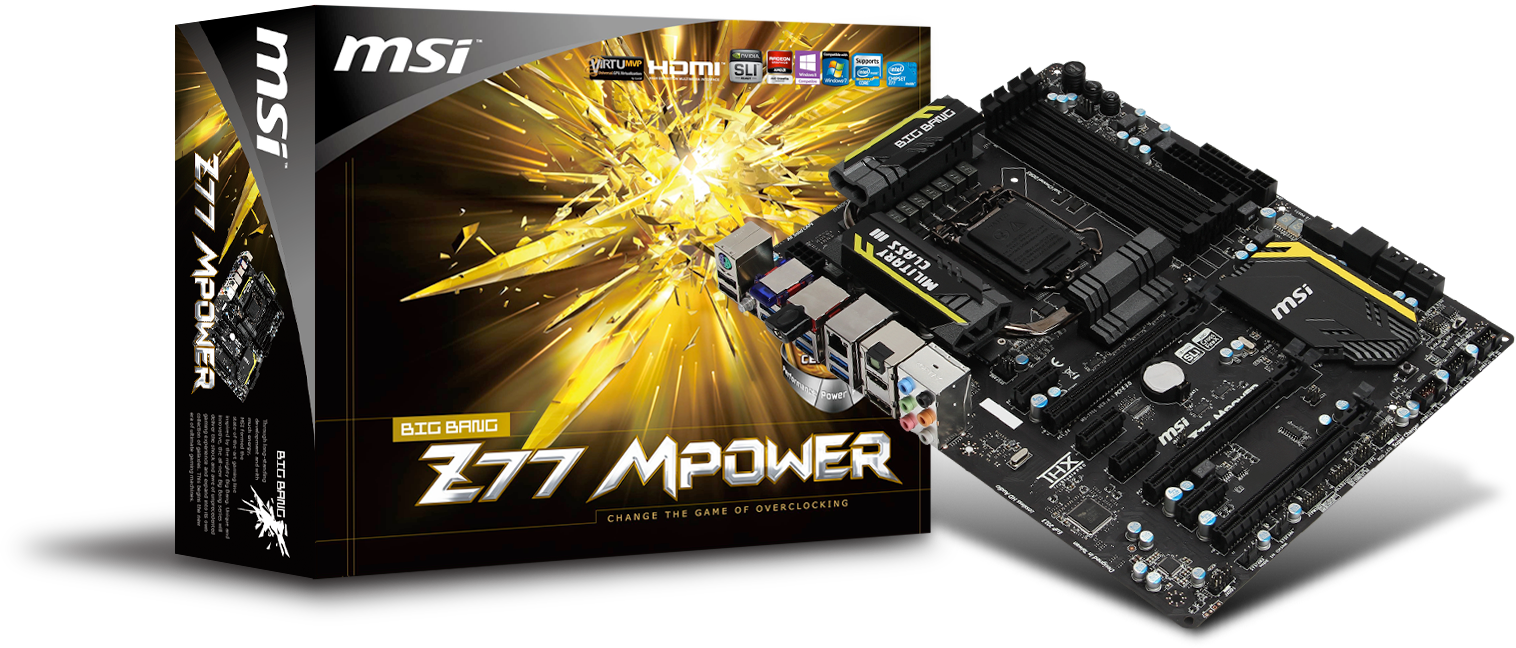
MSI Z77 MPower Review: The XPower’s Little Brother
by Ian Cutress on January 26, 2013 10:30 AM EST- Posted in
- Motherboards
- MSI
- Z77
- Overclocking
Like many other manufacturers, MSI is building brands to aid the development of their product lines. Over the past few Intel chipsets MSI have developed their Big Bang family, such as the P55 Trinergy, P55 Fuzion, X58 XPower, P67 Marshal, X79 XPower-II and now the latest, whilst devoid of the Big Bang part from the official title, is the Z77 MPower. MSI have coined this as ‘XPower-II’s little brother’, designed as an overclocking board to be paired with the MSI Lightning range of GPUs. As a result, the Z77 MPower is designed with the MSI Lightning Twin Frozr IV scheme in mind. We’ve tackled one Z77 overclocking board already, so how does the MSI fare? Read on for the full review.
Overclocking for Z77 – Why Everyone Is At It
The motherboard market shrank in 2012, with reports suggesting that from the 80 million motherboards sold in 2011, this was down to 77 million worldwide in 2012. In order to get market share, each company had to take it from someone else, or find a new niche in an already swollen industry. To this extent, after the success of the ROG range, the top four motherboard manufacturers now all have weapons when it comes to hitting the enthusiast or power user with an overclocking platform. These weapons are (with prices correct as of 1/24):
$400 – Gigabyte Z77X-UP7
$370 – ASUS Maximus V Extreme
$280 – ASUS Maximus V Formula
$240 – ASRock Z77 OC Formula
$210 – MSI Z77 MPower
$200 – ASUS Maximus V Gene
There are two main differentiators between the low (<$250) and the high (>$350) end. The first is usually the choice to include a PLX PEX 8747 chip to allow 3-way or 4-way GPU setups. We covered how the PLX chip works in our 4-board review here, but to summarize, this functionality can add $50-$80 onto the board depending on the bulk purchase order of the manufacturer and the profit margins wanted. The second is usually attributed to the functionality and power delivery – the 32x IR3550s used on the Gigabyte Z77X-UP7 costs them a pretty penny, and the extensive feature list of the ASUS ROG boards usually filters through.
In the past there have been attempts at pure overclocking boards, such as the Gigabyte X58A-OC, which was entirely stripped of all but the necessary components for pushing overclocks under sub-zero conditions for competitions. The board itself was cheaper due to the functionality not present, but it did not provide a rock solid home system for many users. The ASUS ROG range, as we reviewed in 2012, has been releasing motherboards for both gaming and overclocking for several years, trying (and succeeding) with the mATX Gene, ATX Formula and Extreme. All three of these boards continuously push both the gaming and OC frontiers, with a slight gaming focus on the Formula and an OC focus on the Extreme, but all boards cross over into each other’s territory very easily.
A motherboard in this area cannot focus solely on the overclocking component – there has to be additional focus for power users and gamers in order to shift units, as competitive overclocking is a small blip on the radar. I hope all the players realize this!
MSI’s foray into the mix is with their Big Bang range. While it might not have struck the headlines as strongly as some of the other manufacturers, MSI is now splitting the range into two segments similar to ASUS. For the extreme Intel platforms, such as X79/Sandy Bridge-E, we have the X79 XPower-II which we reviewed quite positively early in 2012. For the mainstream Intel platforms, MSI are going with the MPower, coined in advertising videos as the XPower-II’s ‘little brother’. The Z77 MPower seems to have a little more focus than the older XPower-II, with the styling designed to fit in with the MSI Lightning range of GPUs (that are well known for their overclocking prowess), and feedback from MSI’s Master Overclocking Arena (MSI: MOA) extreme overclocking competitions has helped with design.
MSI Z77 MPower Overview
If I were to build a motherboard from scratch, I would first identify all my targets and then order them in terms of importance. If the motherboard was designed to go within a specific price point, I would have a choice of raising the quality of the onboard components as a whole, or deciding to focus the cost on one particular area. This includes power delivery, options specific to each market, controllers, PCIe layout, board layout, heatsink design, and so on. With the Z77 MPower, MSI have hit a small road block in terms of their design philosophy – they wanted a model to bare the Big Bang name for Z77, but focus on both overclocking and gamers alike within tight budget constraints. It happily works for some areas, but not for others, on both the gaming and overclocking side of the coin. Let me explain.
As a gamer, I would want ample space for GPUs, a one-button OC method, plenty of rear IO connectivity with good controllers, a beefed up audio solution, and something to keep me up to date with the latest drivers and software. As an overclocker, I want an improved power delivery, easy-to-use overclocking tools, reductions of instability, a fast boot time, and in the case of extreme overclocking, a board that is easy to prepare and can do the changes I want to do.
As a gamer, the Z77 MPower gives an Ivy Bridge oriented GPU layout with either PCIe 3.0 x16/-/-, x8/x8/- or x8/x4/x4, and with plenty of space for GPU slots one and two. We get OC Genie for a quick CPU OC to 4.2 GHz on an i7-3770K, the rear IO caters for PS/2, USB 2.0, USB 3.0, as well as WiFi, and the Live Update 5 software onboard keeps all the drivers up to date as they are released. On the downside is our regular Realtek ALC898 audio codec with no special design or anything above that (moot point for gamers with their own audio cards), a regular Realtek NIC, the Atheros WiFi is single-stream 2.5 GHz-only, and there are no extra SATA ports. A brief upside in network connectivity is the addition of Realtek software to prioritize traffic over the network, and the color scheme is matched with the MSI Lightning range of GPUs.
As an overclocker, the Z77 MPower gives us a nice flat area around the socket with which to insulate, and the Super Ferrite Chokes and power delivery are designed to be efficient in terms of heat generated. The PCIe triple slot layout helps with mounting copper pots for liquid nitrogen setups, and the PCIe power connector is out of the way. The voltage check points, MultiBIOS, power/reset buttons and two-digit debug are obvious requirements, and the Click2BIOS button ensures BIOS entry every time (which also helps when select Fast Boot options). The WiFi and Bluetooth modules add a potential cause of instability, though these could be removed. The downside is more focused in the software, as we had BIOS issues which restricted on-the-fly overclocking in the operating system, limiting our peak BCLK to 105 MHz (other users have had better results). Nevertheless, we still achieved a load-stable 4988.5 MHz on an i7-3770K using an air cooler that hit 99ºC peak, and our top memory kit was stable at 2800 11-14-14 under stock voltage.
We get a form MultiCore Enhancement at stock settings, meaning the turbo multiplier is ramped up under all loading. Despite this, benchmark wise at stock was a little disappointing and showed minor efficiency losses across the range compared to the competition. The DPC latency time was below 200 microseconds (which is great), although the stock POST times were at 12.78 seconds which is just short of our artificial 12-second goal line. The PCIe layout aided 3-way GPU setups compared to those that borrow four lanes from the chipset (such as the OC Formula), but in comparison the USB 2.0 performance is in a similar hole as the Z77A-GD65 at 25 MBps rather than ~32 MBps of the competition. This is presumably due to the nature of MSI’s default BIOS settings.
Overall the MSI Z77 MPower is a nice board to own, as long as you do not go probing too far into the settings. I like the OC Genie button, although I think the default setting is a little conservative at 4.2 GHz. MSI advertise that every Z77 MPower is tested with a 30%+ overclock for 24 hours running Prime95 under limited airflow conditions, which would push the i7-3770K to 4.55 GHz, and most 3770Ks should do this quite easily so I don’t see why the OC Genie button sets ~4.4 GHz by default. The color scheme fits in nicely with the Lightning GPU series and the Live Update 5 software has been updated and scores very highly in my book, along with a set of nice fan options in Control Center. The MSI Z77 MPower unfortunately misses both side of the coin as it is neither the perfect gamer product nor the perfect overclocking product - it tries to be both, but due to having to hit a price point, it misses key features on both. Nevertheless, I could easily see this in a gaming build with a pair of MSI Lightning GPUs, the OC Genie button pressed and a separate audio card being used. The only question is if it is worth $30 less than the ASRock Z77 OC Formula, or if it is worth more than the $200 mATX ASUS Maximus V Gene.
Visual Inspection
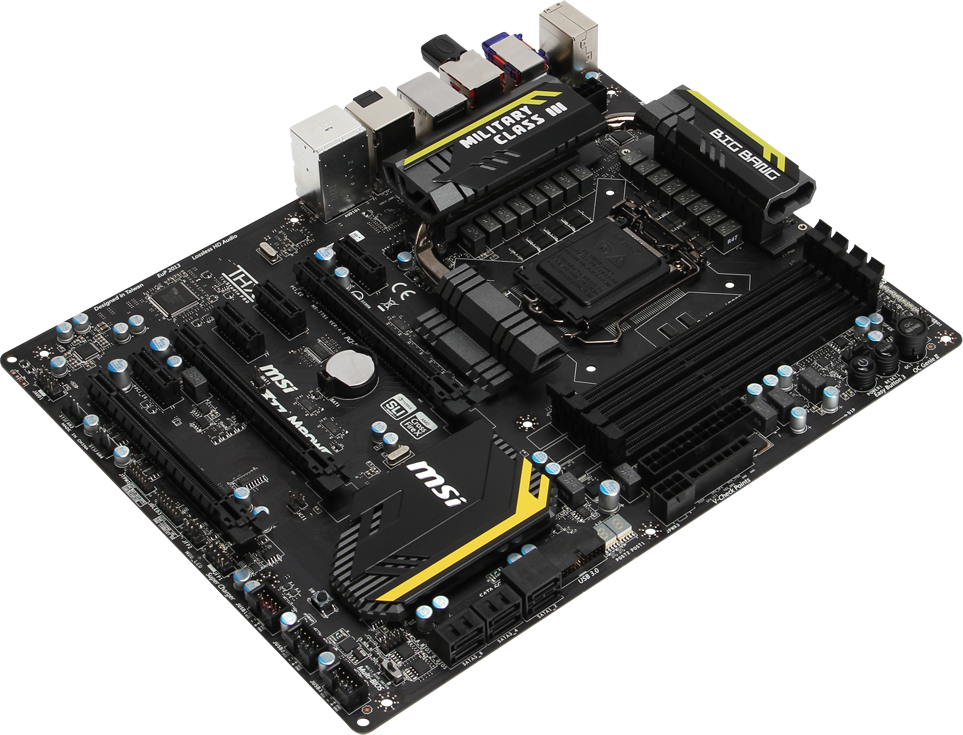
The MSI Z77 MPower greets us with a very sleek and clean black livery with a yellow trim, akin to the Twin Frozr IV used on the MSI Lightning series GPUs. MSI have specifically gone out of their way to make sure all the ports and connectors are black, which is something we do not normally see as many manufacturers will just use what colors they have in stock on lower priced models. According to the marketing material, the top PCB layer is designed to protect all the traces used on the board by putting them down one layer – we see this is the case, and leads to a nicer looking product. It is also argued that this can also help with electromagnetic interference (EMI), resulting in cleaner signals, though we have no way of actually testing that (or if it makes a difference to the end user).
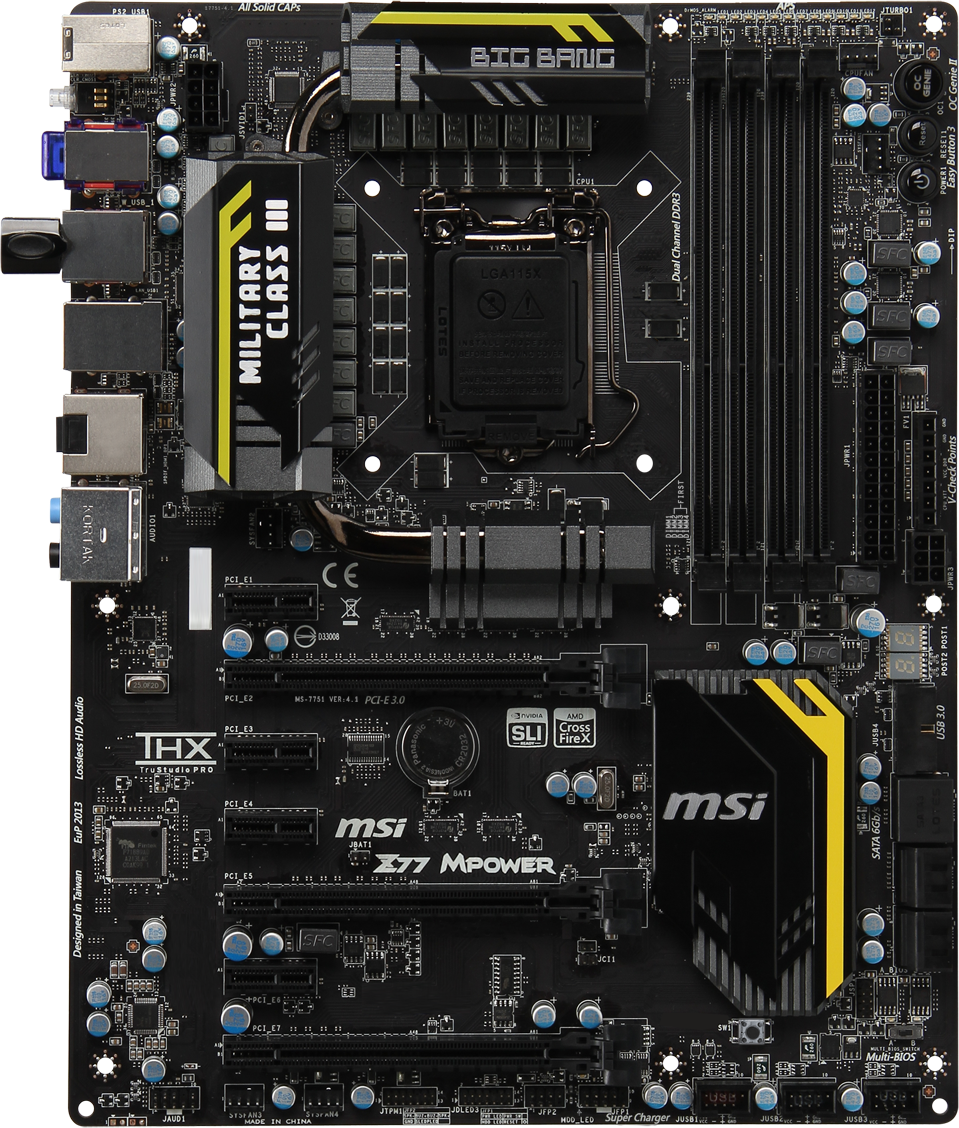
The socket area is nice and clean for insulating, and big air coolers will be hindered more by any memory installed than the power delivery heatsinks. The heatsinks covering the power delivery are all connected via heatpipe, but also low and fat with small grooves for airflow, relying on mass rather than surface area to deal with heat generation. The 8-pin CPU power connector is to the top left of this, relegated away from the edge of the board due to the top heatsink placement.
There are three fan headers around the socket – the 4-pin CPU fan header is the nearest on the other side of the memory, partnered by another system 4-pin, and the third 4-pin is located beneath the main heatsink to the bottom left of the socket. The other two 4-pin fan headers on board are located at the bottom. It is interesting to note that the memory slots here use a dual-latch system, rather than the single sided latch that is started to be the norm on some Z77 boards, and can be preferred by overclockers that take out/put in hardware frequently.
On the top right we get a series of lights informing the user how many of the phases are being used at any one time, a header for the MSI MultiConnect Panel (which was announced in Dec 2011 but I cannot find a record of it ever being on sale), two of the afore mentioned fan headers, and what MSI Call ‘Easy Button 3’, which to the rest of us means a power button, a reset button, and the OC Genie button. Further down we get our 24-pin ATX power connector, which is slightly inside the edge of the board in order to accommodate 7 voltage check points and a 6-pin PCIe VGA power connector. Having the 24-pin ATX power connector slightly away from the motherboard is not unheard of, but I would prefer it up against the edge to make cable routing easier, and so if I had to use the V-Check points, the cable from the PSU would not be in the way.
We get a two-digit debug display beneath the 6-pin PCIe VGA connector, which is ultimately useful for debugging or overclocking. It also doubles up as a CPU temperature display after POST, which I would love to be the norm for all two-digit debug displays. Our USB 3.0 header is found at right angles to the board just above the SATA ports, which allows it to be used when a large GPU is put in place and is in an ideal location for any case USB 3.0 or for a front panel USB 3.0 device. Our SATA ports are the six from the chipset (no additional controllers here), with the top two being SATA 6 Gbps and the bottom four being SATA 3 Gbps. The MultiBIOS switch is below these, which allows for changing to a different overclocking BIOS or switching out when a BIOS error occurs (more about this later).
The chipset heatsink follows the design of the power delivery heatsinks, being black with a yellow motif, but the more grooves in this heatsink suggest that in order to dissipate the ~7W from the chipset, air flow and heat sink surface area are preferred. The interesting button is below the chipset, in the form of a Go2BIOS button. This is something I originally saw on the Intel DX79SI on the back panel, but due to the new quick booting options now applied in BIOSes, users cannot easily access the BIOS. Previously it required either a BIOS reset, or if the board was in a case, software. The software is still part of the package, but overclockers would prefer not to install XYZ if they do not have to – hence the inclusion of this button. Despite this, the button has the potential of being obscured if the second GPU is a large three-slot monster, but I am glad it is present.

The bottom of the board, from left to right, gives us the front panel audio connector (Realtek ALC898), two 4-pin fan headers, a TPM header, a JDLED3 header (translates as Jumper Diagnostics LED3 header, though the manual explicitly states it is used for the MSI Voice Genie, another Dec-2011 announced but yet-to-be-released product), two front panel headers (one for buttons and lights, another for lights and buzzers) and three USB 2.0 headers, the first of which is for fast charging.
The PCIe layout is designed to aid single and dual PCIe device users, though the layout supports the full tri-GPU Ivy Bridge specifications, splitting the 16 PCIe 3.0 lanes either x16/-/-, x8/x8/- or x8/x4/x4 rather than some other motherboards (ASRock Z77 OC Formula for example) that borrow four PCIe 2.0 lanes from the chipset for the final full-length PCIe port. From top to bottom, we get a PCIe x1, x16 (runs at x16 or x8), x1, x1, x16 (runs at x8 or x4), x1, x16 (runs at x4). The top PCIe x1 will only support half-width PCIe x1 cards due to the location of the extended power delivery heatsink.

The rear IO panel is designed to be full of functionality, and MSI have pressed on with a large number of rear USB 3.0 ports, despite the fact that they do not seem to work when installing an OS – I use three USB devices to install an OS (Keyboard, Mouse, USB Stick with OS image), so only having access to two means I have to switching the mouse/keyboard until the USB 3.0 drivers are installed. However, from left to right we get a combination PS/2 port, two USB 2.0 ports, a ClearCMOS button, a Bluetooth 3.0+HS module (Atheros AR3011), two USB 3.0 ports from the chipset, four USB 3.0 ports from a Renesas uDP72020 controller, a WiFi 802.11b/g/n 2.5 GHz only module (Atheros AR9271), a gigabit Ethernet port (Realtek 8111E), a HDMI output, a DisplayPort output, an optical SPDIF output and audio jacks.


Board Features
| MSI (Big Bang) Z77 MPower | |
| Price | Link |
| Size | ATX |
| CPU Interface | LGA-1155 |
| Chipset | Intel Z77 |
| Memory Slots |
Four DDR3 DIMM slots supporting up to 32 GB Up to Dual Channel, 1066-3000 MHz |
| Video Outputs |
HDMI DisplayPort |
| Onboard LAN | Realtek 8111E |
| Onboard Audio | Realtek ALC898 |
| Expansion Slots |
3 x PCIe 3.0 x16 (x16/-/-, x8/x8/- or x8/x4/x4) 4 x PCIe 2.0 x1 |
| Onboard SATA/RAID |
2 x SATA 6 Gbps (Chipset), RAID 0, 1, 5, 10 4 x SATA 3 Gbps (Chipset), RAID 0, 1, 5, 10 |
| USB |
4 x USB 3.0 (Chipset) [2 onboard, 2 rear panel] 4 x USB 3.0 (Renesas uDP72020) [4 rear panel] 8 x USB 2.0 (Chipset) [6 onboard, 2 rear panel] |
| Onboard |
2 x SATA 6 Gbps 4 x SATA 3 Gbps 1 x USB 3.0 Header 3 x USB 2.0 Header 5 x Fan Headers 1 x Multi-BIOS Switch 1 x TPM Module 1 x Multi-Connect Panel Header 1 x Debug LED 7 x Voltage Check Points 1 x Go2BIOS Button 1 x OC Genie Button Power/Reset Buttons Front Panel Header Front Panel Audio Header |
| Power Connectors |
1 x 24-pin ATX Power Connector 1 x 8-pin CPU Power Connector 1 x 6-pin PCIe Power Connector |
| Fan Headers |
1 x CPU (4-pin) 4 x SYS (4-pin) |
| IO Panel |
1 x Combination PS/2 Port 2 x USB 2.0 1 x ClearCMOS Button 1 x Bluetooth 3.0+HS (Atheros AR3011) 1 x WiFi 802.11 b/g/n (Atheros AR9271) 2 x USB 3.0 (Chipset) 4 x USB 3.0 (Renesas uDP72020) 1 x Optical SPDIF Output 1 x HDMI 1 x DisplayPort Audio Jacks |
| Warranty Period | 3 Years |
| Product Page | Link |
Some of the functionality on board is worth of praise – OC Genie, the Power/Reset/Two-Digit combination and the Go2BIOS button should help both gamers and overclockers alike. The use of five 4-pin fan headers will suit everyone as well, and the voltage check points will help extreme overclockers monitor their hardware. On the functionality, the location of the Bluetooth/WiFi modules frees up space on the board itself, though ideally a 5 GHz WiFi module should have been considered. The Realtek combination of NIC+audio are often sold at discount, and MSI might have considered a better audio chip with EMI shielding in order to push the board onto gamers. The Renesas USB 3.0 controller is a relative unknown – I would have preferred the middle ground and gone with a two-port controller and switched to another pair of USB 2.0 ports just for compatibility. The lack of extra SATA controllers puts the MSI Z77 MPower a step behind the ASRock Z77 OC Formula in storage.


14 Comments
View All Comments
sherlockwing - Saturday, January 26, 2013 - link
I really love the 90 degree USB3.0 port on this board, it makes hiding the large and bulky 3.0 connector so much easier.This was one of board I considered before I bought my UP5-TH. Unforunately this board like most MSI boards use analog VRMs and MSI Bios don't allow Offset Overclocking so I went with the UP5-TH instead.
Blibbax - Saturday, January 26, 2013 - link
What exactly does this board need to be a top-notch overclocking board?IanCutress - Saturday, January 26, 2013 - link
A revised BIOS layout for options, a fully working software package that allows overclocking without issues in the OS (for digital power delivery options as well), and a series of automatic overclocking options for users that are unsure about overclocking but want more than the 4.2 GHz that OC Genie provides. There are a couple of boards in the $240-$280 range that adjust the VRM heatsinks to allow water cooling as well. Extreme overclockers would perhaps enjoy switches to disable PCIe slots, a wider variety of temperature probes on board, onboard on-the-fly adjustment buttons and a super level of BIOS options for skew, slew et al.Ian
NitroWare - Saturday, January 26, 2013 - link
The Intel ME is no longer solely ganged to the primary firmware and has not been for a while.Intel's package allows the ME to be invidually flashed or recovered using a number of bundled tools from DOS or Windows . Grab the ME pack either from the board OEM,Intel or station-drivers if you want to use the bleeding edge build#
If you are lazy, you can use asus's updater as it has been QA'd for end users IntelME81_Updating_Tool_V10001.zip from any ASUS Z77 download page, which is just Intel's flash tool and binary bundled with a custom ASUS front end which doesnt really work too well especially if you need to downgrade or reflash - they forgot the decision trees in the front end, but Intel's tool works well.
This will either contain a installshield or loose files
The Intel tools you are looking for are in neatly organised folders. MEtool.exe and FWUpdLcl64.exe, found in a variety of packages especially the ASUS package
both have context senstive help to dump version#s, recover, or force/flash the ME.
There are 2 sizes of ME for v8, 1.5MB and 5MB. Consumer Z77 use 1.5MB, I dunno what the 5MB one is for, maybe vPro systems
I cannot see any OEM custom builds as the binary comes from Intel, but each OEM releases a slightly older or newer buld depending on random reasons. I have used bleeding edge builds on various mobos without issue but that is something for personal preference.
I honestly can' remeber if you can flash v7 to v8 as it has beren a while since I have however last year for releaser of Ivy Bridge, Cougar Point (7 series) and Win8 some mobo vendors such as ASrock did a complete overhaul of their UEFI BIOS and updated all of the modules to the latest standard.
Z77 boards should have come with v8 or v8.1 ME anyway, I can't see why theyd ship a v7.
ASUS provided a end-user recommended update to 8.1 to 'enhance windows 8' as above.
Intel Desktop Boards support 8.1 also.
One wonders why they dont take this approach with the RAID OROM, as its just a BIOS module anyway.
NitroWare - Saturday, January 26, 2013 - link
I forgot to add that some third party vendors such as NEC-Renesas and ASmedia make it painful to flash the firmware for their products. ASmedia needs a DOS boot disk afaik.Some other vendors make it dead easy.
Why do you feel a one touch OC key is needed? Do you not think this is a gimic? It may be handy for bench testing but everything should be point and click or at least front bay controlled once the system is built up.
Sabresiberian - Saturday, January 26, 2013 - link
One of my "pet peeves" with mainboards is that the socket layout is terrible on pretty much all of them - regardless of size of board. They don't even take advantage of having more room in an E-ATX, XL-ATX, or what have you.This board has one of the best layouts I's seen in the sense that I could actually install 2 PCIe-1 devices even after installing 3 graphics cards! Unfortunately, that would make the graphics cards run on 8x-4x-4x and isn't enough for me, but still, it is a tempting board just for the socket layout. Most boards won't even allow for 1 PCIe-1 device if you have 3 graphics cards installed. It's ridiculous, in my opinion.
I love the color, too. Nice thing about black - it pretty much goes with anything, so even if my memory and graphics cards didn't match in color scheme, the mainboard wouldn't really add to a color confusion explosion. The yellow areas are small enough that they won't have much of an impact (I think).
I have built more computers based on MSI mainboards (hence my exposure to and acceptance of a term I like better, "mainboard" :) ) than any other brand, and they've always been reliable. I tend to prefer Asus these days for high end, but would always consider an MSI offering.
mayankleoboy1 - Sunday, January 27, 2013 - link
With someVRM moving to the CPU in Haswell, i expect the mobo to get a cleaner layout. Or that the space could be used for cramming some additional stuff. Not sure which i would prefer....cjb110 - Sunday, January 27, 2013 - link
You mention that there's no help on-screen, but are the BIOS settings detailed in the manual though?As I'd say that's acceptable, maybe not for the target market (that would more likely be changing settings regularly), but for a general user a once-off trip to the BIOS with the manual next to you would be fine.
peterwhitehouse - Sunday, January 27, 2013 - link
Surely this is not true for Windows 8 as that has native USB 3.0 support?Perhaps if we ever see a Windows 7 SP2 that may possibly support USB 3.0 natively as well.
peterwhitehouse - Monday, January 28, 2013 - link
I have checked this today and Windows 8 does indeed support USB 3.0 ports during install as suspected so I guess we can cross off having lots of USB 3.0 ports on the rear as being a possible downside.