Original Link: https://www.anandtech.com/show/11618/asus-prime-z270-a-gigabyte-z270x-ultra-gaming-motherboards-review
The Asus Prime Z270-A & GIGABYTE Z270X-Ultra Gaming Motherboard Review
by E. Fylladitakis on July 18, 2017 10:45 AM EST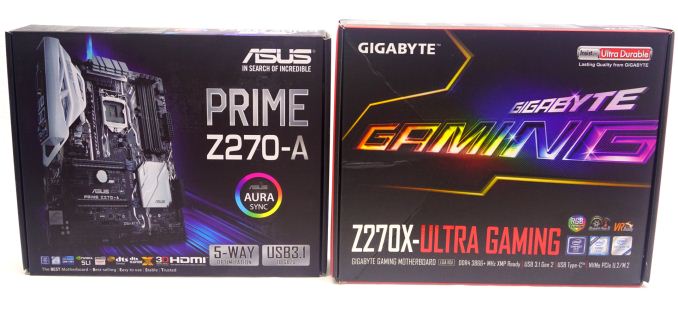
Shortly after Intel released the Z270/H270 chipsets earlier this year to accompany their latest Kaby Lake processors, the market flooded with myriads of motherboards based on these new chipsets. It is technically impossible for us to review all of them in a timely manner, especially considering that Intel’s new chipsets and processors might come at some point in the next few quarters. When GIGABYTE or ASRock launch 50 different boards, it would be a tough task to test them all! So although we enjoy reviewing top tier products that bring new, unique and interesting features, it is a fact that reasonably priced products are by far the most popular, even amongst seasoned overclockers, hardcore gamers, and advanced enthusiasts.
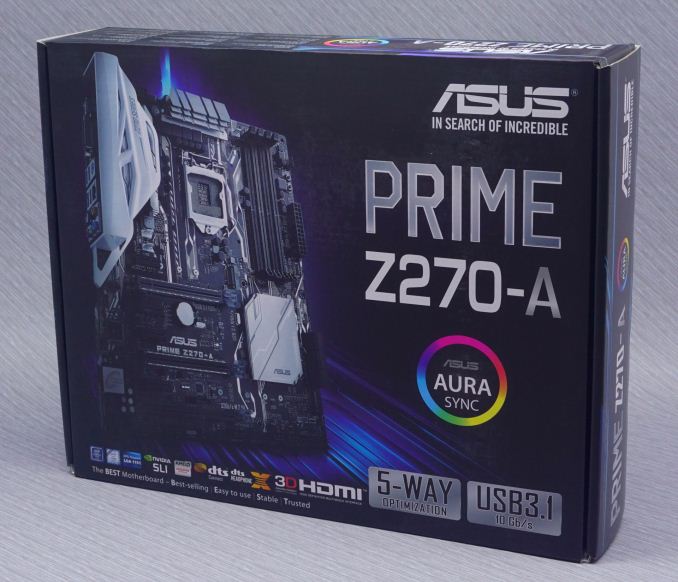
In this review, we are having a look at two advanced but reasonably priced mainstream offerings, the Asus Prime Z270-A and the GIGABYTE Z270X Ultra Gaming. Both of these boards are selling for just under $170, yet their specifications are very impressive. We will examine their features, differences, and performance in the following pages of this review.
Other AnandTech Reviews for Intel’s 7th Generation CPUs and 200-Series Motherboards
($140) The ASRock Z270 Killer SLI Review
($140) The MSI Z270 SLI PLUS Review
The Intel Core i7-7700K (91W) Review - CPU Review
The Intel Core i5-7600K (91W) Review - CPU Review
The Intel Core i3-7350K (60W) Review - CPU Review
CPU Buyer's Guide: Q2 2017 - Guide
In comparison to the older Z170 boards, the new Z270 board on the base specifications are hardly any different. The Z270 ones have four extra PCIe lanes configurable on the chipset, potentially new audio and new networking controllers, and Intel Optane Technology Support. Although four extra PCIe lanes do sound like a huge difference, it is an important upgrade for the implementation of native M.2 slots compared to previous generations - on Z170-based motherboards, this usually meant disabling some other device/port on the motherboard. What Z270 brings to the platter with Intel's Optane drives is their 'smart caching' technology, although they will still operate as SSDs in any other system.
The Intel Optane Memory (SSD) Preview: 32GB of Kaby Lake Caching
Individual motherboard manufacturers will be sprinkling on new features onto their Z270 products to aid the transition and provide other tangible benefits over the old platform. To read specifically about the Z170 chip/platform and the specifications therein, our deep dive into what it is can be found at this link.
One thing that we should note is that the advent of the Z270 chipset brought a change on the naming of the USB ports. What we knew as USB 3.0 ports that run at 5 Gbps are now being dubbed as “USB 3.1 Gen 1” and the 10 Gbps ports are now called “USB 3.1 Gen 2”. We have encountered this change while reviewing several motehrboards, including the MSI Z270 SLI Plus a few months ago, but it seems that all of the manufacturers are following suit, rewriting their websites and reprinting their manuals as per the new USB naming specifications. Users need to be extra careful when very high bandwidth connectors are essential.
Asus Prime Z270-A Overview
The designers of the Asus Prime Z270-A tried to implement a mix of practical, aesthetic and unique features, all while maintaining the price tag below $170. This encompasses power delivery, audio, storage, DRAM, networking, and the software package.
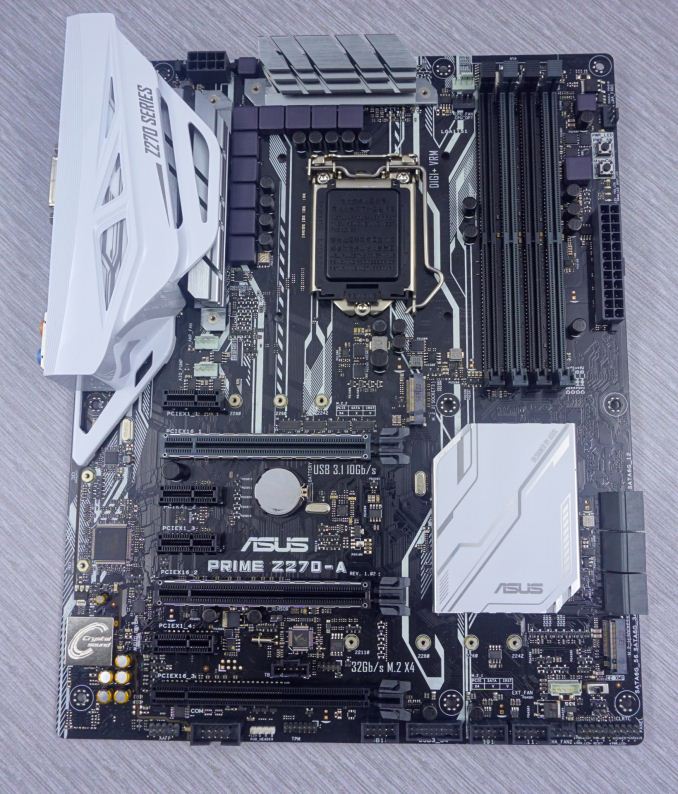
On storage, a quick glance reveals that the motherboard has two M.2 PCIe 3.0 x4 slots, with one of them supporting M.2 devices up to 110 mm long, and a total of six SATA 6Gb/s connectors. There are no native U.2 connectors, but U.2 drives can be connected to the M.2 slots by using appropriate adapters. The first M.2 slot does not share its bandwidth with any PCIe devices but the use of an SATA M.2 drive will disable one of the SATA ports. The second M.2 slot shares its bandwidth with two SATA ports and using a PCIe ×4 M.2 drive will disable them. Asus’s engineers took this approach instead of having the second M.2 slot sharing its bandwidth with the third PCIe ×16 slot (it operates at ×4 maximum) so that the use of a second M.2 drive will not prevent the use of a high bandwidth PCIe device but limit the number of SATA drives instead.
For audio, Asus is particularly proud about their implementation of the Realtek ALC S1220A (or ALC1220A) audio codec and is placing a lot of their marketing efforts on it. At this point, we should note that the ALC1220A is identical to the ALC1220, but the 'A' is an ASUS specific implementation that has been manufactured by Realtek in co-operation with ASUS. What this does is remove extraneous features that ASUS does not need, such as an I2S output that would be useless given the absence of a DAC-driven device. The ALC1220 codec itself is not particularly unique, as many Z270-based motherboards are currently using it, including the GIGABYTE Z270X Ultra Gaming that we are reviewing alongside the Asus Prime Z270-A in this review, but the ALC1220A is certainly an ASUS specific implementation. Asus’s engineers placed a lot of effort on maximizing the codec’s potential via shielding, power regulation, and filtering techniques.
Intel supplies the rather popular I219-V Gigabit LAN chipset and ASMedia’s ASM2142 controller provides two USB 3.1 Gen 2 ports (one Type-A and one Type-C). There are four more USB 3.1 Gen 1 ports at the back of the motherboard, with two additional USB 3.1 Gen 1 and six USB 2.0 ports accessible via its internal headers. A 5-pin Thunderbolt and a TPM header are also present.
GIGABYTE Z270X-Ultra Gaming Overview
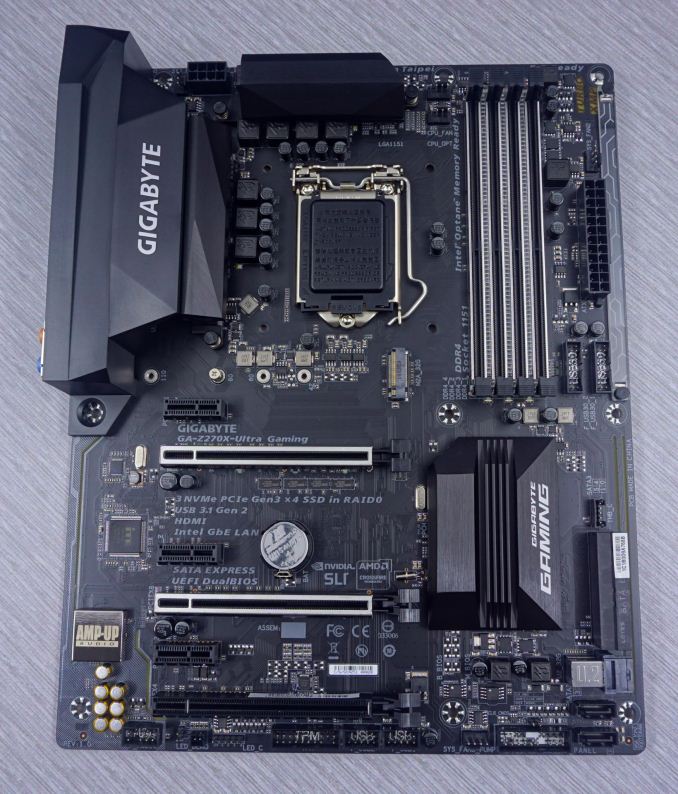
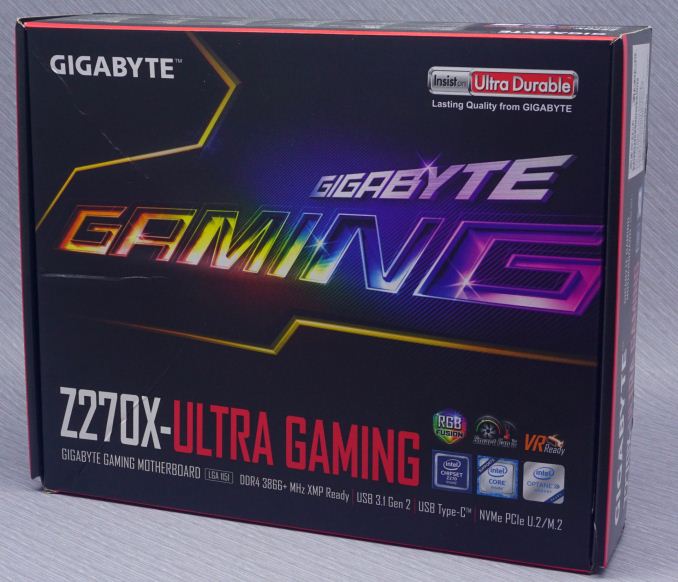
The GIGABYTE Z270X Ultra Gaming is the spiritual successor of the GIGABYTE Z170X Ultra Gaming that we reviewed last year, sharing almost the same features and selling for roughly the same price. One of this motherboard’s most prominent features is the native U.2 drive support and the presence of two SATA Express connectors. There is only one M.2 PCIe 3.0 x4 slot, supporting devices up to 110 mm long, and six SATA 6Gb/s connectors. Neither the M.2 or the U.2 slots share their bandwidth with other components, but each of the SATA Express connectors will occupy two SATA connectors if used.
Bandwidth sharing takes place on the PCIe slots. The configuration of the two first PCIe ×16 slots is typical, with the first slot operating at ×16 mode with only one card installed, and sharing its bandwidth with the second slot when two cards are installed (×8 per slot). The third PCIe ×16 slot comes from the chipset, and has a maximum bandwidth of ×4 under any circumstances and also shares its bandwidth with two of the PCIe ×1 slots. Using PCIe ×1 devices in these slots will not disable the third full-length PCIe slot completely, but will reduce its bandwidth down to ×1 as well.
GIGABYTE implements the regular Realtek ALC1220 audio codec, along with the Intel I219-V Gigabit LAN chipset that Asus does, both of which are excellent choices for mainstream motherboard designs. The ASMedia ASM2142 controller provides two USB 3.1 Gen 2 ports (one Type-A and one Type-C) and the Intel Z270 chipset eight USB 3.1 Gen 1 ports (4 ports on the back panel, 4 ports available through the internal USB headers). There are also two USB 2.0 ports on the back panel and two internal headers for four more USB 2.0 ports. GIGABYTE’s engineers also installed TPM and Thunderbolt internal headers.
| Motherboard Comparison | ||
| Asus Prime Z270-A | ||
| Socket | LGA1151 | LGA1151 |
| MSRP at Review | $156 | $156 |
| DRAM | 4 x DDR4 | 4 x DDR4 |
| PCIe Layout | x8/x8 | x8/x8 |
| BIOS Version Tested | 0604 | F6 |
| MCT Enabled Automatically? | Yes | Yes |
| USB 3.1 (10 Gbps) | ASMedia ASM2142/Intel Z270 | ASMedia ASM2142/Intel Z270 |
| M.2 Slots | 2 x PCIe 3.0 x4 | 1 x PCIe 3.0 x4 |
| U.2 Ports | No | 1 x PCIe 3.0 x4 |
| Network Controller | 1 x Intel I219-V | 1 x Intel I219-V |
| Audio Controller | Realtek ALC1220 | Realtek ALC1220 |
| HDMI 2.0 | No | No |
Asus Prime Z270-A Board Features
This particular design from Asus appears to be an attempt to entice the bulk of advanced users, gamers and overclockers alike, by attempting to combine practical features, RGB lighting, and advanced configurability. In order to keep the retail price competitive, Asus’s engineers did not install any features and/or technologies that are of little interest to the average user - such as those that currently display very low adoption rates like SATA Express and U.2 connectors. On the other hand, we can see that the engineers are focused on boosting the primary selling points of the motherboard.
| Asus Prime Z270-A | |
| Warranty Period | 3 Years |
| Product Page | Link |
| Price | $169 |
| Size | ATX |
| CPU Interface | LGA1151 |
| Chipset | Intel Z270 |
| Memory Slots (DDR4) | Four DDR4 Supporting 64GB Dual Channel Up to 4133 MHz |
| Memory Slots (DDR3L) | None |
| Video Outputs | HDMI 1.4 DVI-D DisplayPort 1.2 |
| Network Connectivity | Intel I219-V |
| Onboard Audio | Realtek ALC1220 |
| PCIe Slots for Graphics (from CPU) | 2 x PCIe 3.0 (x16/x0, x8/x8) |
| PCIe Slots for Other (from PCH) | 4 x PCIe 3.0 x1 1 x PCIe 3.0 x16 (max x4 mode) |
| Onboard SATA | Six, RAID 0/1/5/10 |
| Onboard SATA Express | None |
| Onboard M.2 | 2x PCIe 3.0 x4 or SATA, RAID 0/1, NVMe |
| Onboard U.2 | None |
| USB 3.1 | 1 x Type-A on back panel, ASMedia ASM2142 1 x Type-C on back panel, ASMedia ASM2142 |
| USB 3.0 | 4 x Rear Panel 2 via headers |
| USB 2.0 | 6 via headers |
| Power Connectors | 1 x 24-pin ATX 1 x 8-pin CPU |
| Fan Headers | 1 x CPU (4-pin) 1 x Pump (4-pin) 3 x CHA/SYS (4-pin) |
| IO Panel | 4 x USB 3.0 (USB 3.1 Gen 1) 1 x USB 3.1 Type-A 1 x USB 3.1 Type-C 1 x Network RJ-45 1 x DisplayPort 1.2 1 x HDMI 1.4 1 x DVI-D 1 x Audio Jacks 1 x Optical SPDIF Out Port |
| Other Features | COM/Parallel Port Header TPM Header Front Audio Header RGB LED Connector Thunderbolt header |
In The Box
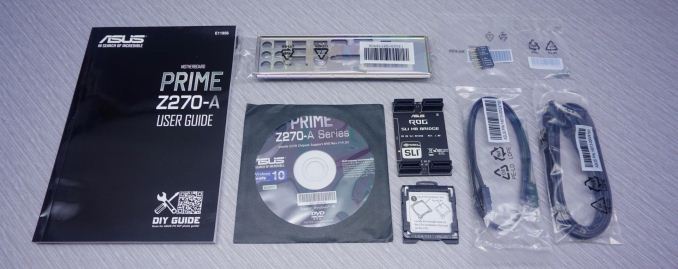
We get the following:
- Driver Disk
- Manual
- Rear I/O Shield
- Three black SATA cables (two straight, one with a 90° connector)
- CPU installation tool
- Quick case cable connector
- Two-way SLI bridge
Asus is not particularly generous with their bundled items but that is understandable considering the price range of the Prime Z270-A. The user’s manual is only printed in English but is very detailed. A QR code at the front of the manual brings the user to a basic but adequate DIY guide. Asus also includes a “CPU installation tool”, which is just a plastic holder that can be used to place the CPU into the socket without touching it with bare hands.
The quick connector (Q-Connector) is a simple but handy item for users that allows them to connect all of the case’s cables in a single move. The rest of the items consist of the typical DVD with the drivers and other software, a standard I/O shield, and three black SATA cables. Three is an interesting number not often seen in motherboard bundles, but facilitates a set of boot SSD, storage HDD and optional ODD.
Visual Inspection
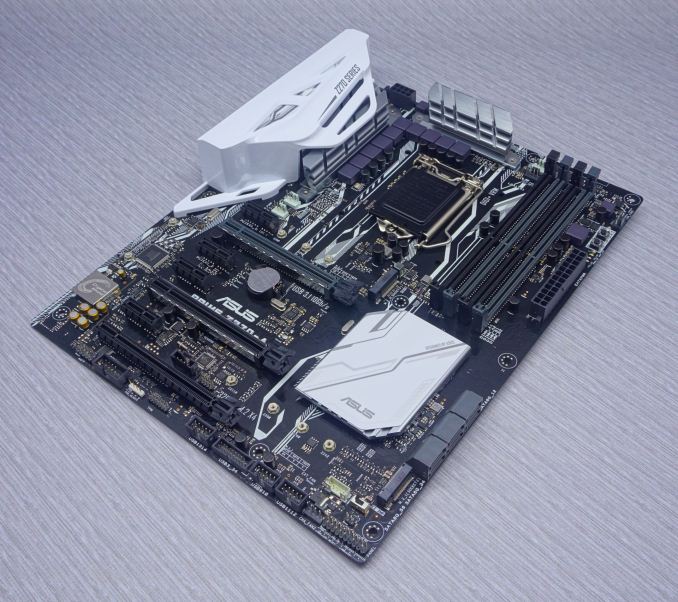
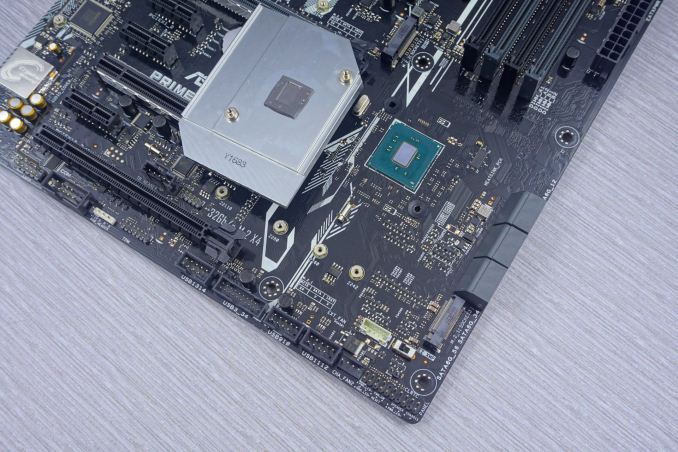
Asus’s designers had to make the Prime Z270-A a motherboard that is both functional and also aesthetically pleasing, given the price and the target market. They hit the nail on the head with the placement of the headers and connectors, placing all of the internal headers across the bottom and the SATA connectors to the lower right corner of the motherboard. The only exceptions are the internal Thunderbolt header and one of the USB 2.0 headers, which are right above the third full-length PCIe slot.
A physical switch right above the headers at the lower right corner of the motherboard is an interesting addition. This switch allows the user to force the RAM modules to activate their XMP settings regardless of any BIOS settings, removing the need to go into the BIOS (which very few users do). The first two full-length PCIe slots feature a metal brace that assists in rigidity, preventing wrapping and damage due to excessive force, weight, or the combination of the two. This brace also indicates the slots most suited for GPUs. The third full-length PCIe slot and the DIMM slots do not feature such a brace.
Beauty lies in the eyes of the beholder, but we feel that Asus crossed some lines here. As a motherboard that features RGB lighting, the colors of the motherboard need to be neutral and its design simple, effectively matching any lighting color selection. Black and white are both neutral colors, yet the use of both on the same motherboard is highly contrasting, and the presence of silver/chrome parts makes matters even worse. The design of some parts, such as the plastic cover over the rear I/O ports, feels unnecessarily complex. Although the LED lighting is very well applied and bright and with virtually no dead spots around the motherboard, its physical design may be too extravagant for some.
The space between the two primary PCIe ×16 is arranged in an expanded setup, allowing for better cooling when two large cards/GPUs are installed. The third full-length PCIe slot can operate up to ×4 mode and, considering that it also lacks a metal support, the designer meant it to be used for devices other than GPUs, such as PCIe SSD drives or RAID controllers. SSD drives installed on the third full-length PCIe slot can be included in Intel RST/RAID configurations with the onboard M.2 slots, as all the drives will come from the chipset. Typically, the top M.2 slot is right above the first PCIe ×16 slot and can support devices up to 80 mm long (2280 type). Using an SATA drive on the first M.2 slot will disable one of the SATA ports, but PCIe drives will have no such effect. The second M.2 slot is below the motherboard’s chipset and supports devices up to 110 mm long (22110 type). This slot shares its bandwidth with two of the SATA ports and will disable them if a PCIe ×4 drive is installed.
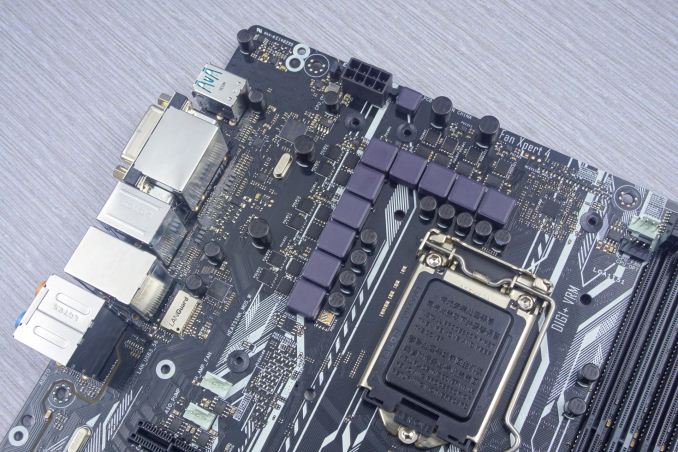
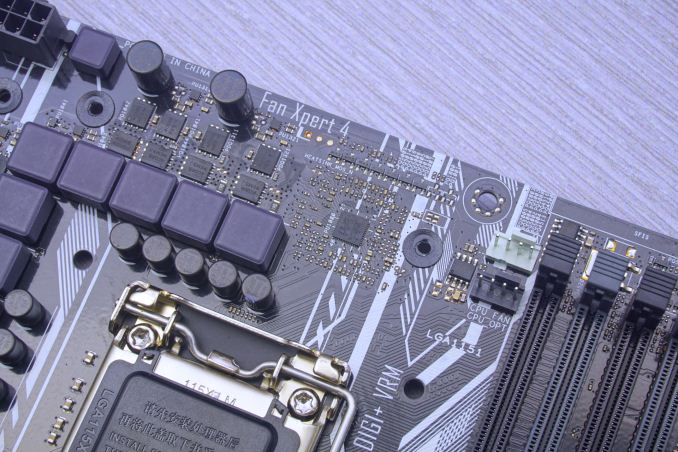
Asus installed five fan headers. Two are meant for the CPU (primary fan plus an auxiliary fan) and are placed between the CPU and the DIMM slots. There are three headers for case fans, one at the top right corner and two next to each other at the middle left of the motherboard. Note that the two headers to the left of the motherboard are “high amp” headers, meant for powerful fans and/or liquid cooling pumps. There are no fan headers anywhere near the bottom of the motherboard.
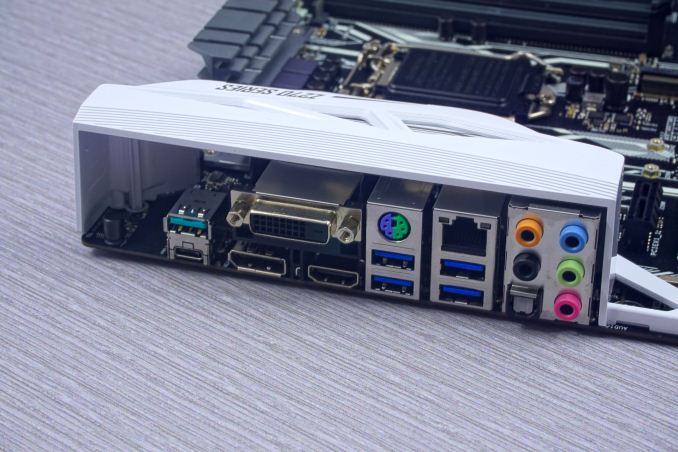
The rear panel of the Asus Prime Z270-A may appear incomplete to some users, as the designers decided not to include any USB 2.0 ports and there is a bit of dead space near the top of the board. There are three display ports, one DVI-D, one DisplayPort 1.2 and one HDMI 1.4a. The HDMI port is limited to 30Hz @ 3840 × 2160 or 24Hz @ 4096 × 2160, but the DisplayPort 1.2 is capable of 60 Hz @ 4096 x 2304. We can also see one USB 3.1 Type-C and one USB 3.1 Type-A (teal) ports from the ASMedia ASM2142 controller, four USB 3.1 Gen 1 ports (blue), five 3.5 mm analog audio jacks, one optical SPDIF port, a legacy PS/2 port and the LAN cable port.
Asus went slightly overboard with the thickness of the thermal pads that they are using, which appears to be a good thing considering how good the contact between the heatsinks and the chipset/VRMs is. Unless very severe overclocking is going to take place, these heatsinks are more than adequate for the cooling needs of the motherboard.
The company painted and rebranded most of the components, which makes some of them difficult to identify. We could only identify some of the black polymer capacitors to be Nichicon FPCAP products. The only exception is the small audio capacitors at the bottom left corner of the motherboard, which are clearly branded and supplied by Nichicon. At this point, we should note that the audio circuitry is on a section of the PCB that has been mostly physically separated in an attempt to minimize noise and distortion from other components.
The VRM circuit is a 10-phase (8+2) design, with the phases distributed to the four different input voltages that the modern 1151 CPUs require (Core, I/O, Graphics, and System). The DIGI+ VRM controller is unique to Asus. The 4C06B and 4C09B MOSFETs are supplied by ON Semiconductor, which is common on recent Asus motherboards.
BIOS
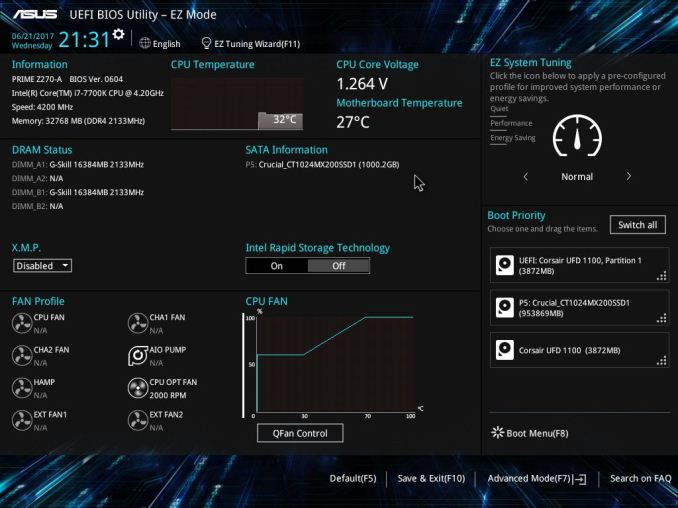
Much like as most advanced motherboards nowadays, the Asus Prime Z270-A features a graphical, multilingual UEFI BIOS with mouse support. Its default state is the “EZ Mode” that compresses the most important BIOS options into a single screen. Most of the tabs in this screen are informative and the modifiable options are basic and vague on purpose. For example, the user can enable the RAM’s X.M.P. (if applicable) but not tweak any other settings unless the user migrates into the advanced mode.
At the top right corner of the screen, there is the EZ System Tuning that allows the user to switch between pre-programmed operation modes, but there is no obvious indication regarding the settings that it affects without going through the process. From this page, the user can also access the onboard fan controller settings. We found that the motherboard’s sensors may be a little too optimistic, as the motherboard’s sensor was registering a temperature of 27°C, which was equal to the room temperature at the time.
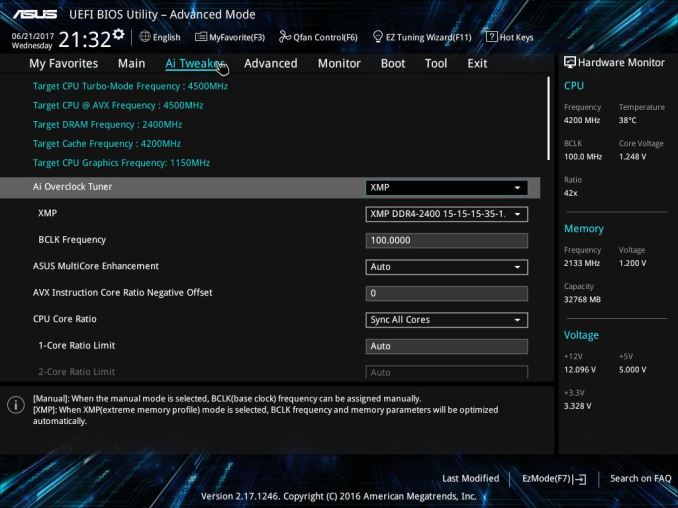
In order to reveal the sum of the BIOS options, the user needs to go into the “Advanced” mode (F7). The advanced mode initially looks straightforward, with only eight main menus, but there are dozens of submenus hidden into each of them.
The first main menu option, “My Favorites”, is initially empty. This section displays only the options that the user manually marks as favorites and nothing else. The “Main” menu is where the BIOS defaults into when entering the advanced mode and mostly is an informative screen, with options only to change the language, time and date. In the “Tool” menu Asus placed a few of basic applications, including the “EZ Flash 3” utility for upgrading the BIOS. The “Secure Erase” tool is a low-level format application that is designed to “restore the performance of your SSD”. It will irreversibly destroy all data on the said SSD, so it definitely is not a very practical solution. Finally, the “Exit” menu also is very simple, meaning that the tons of tweakable options are all under the four remaining menus.
The Ai Tweaker menu immediately brings up a long, scrollable list of options and submenus that will overwhelm any amateur user. From here the user can change the RAM XMP profiles, the BCLK and RAM frequency settings, the CPU clock ratio (per core) and most of the important voltage values. There are also options for automated overclocking.
More options are accessible via submenus (the “>” sign denotes that the option will bring up a submenu). The first submenu is called “DRAM timing control” and brings up dozens of RAM timing options, with even more options into other, secondary submenus. We feel that the vast majority of the users that will manually adjust the timing settings of their RAM modules will stick to the three primary timing settings, with the rest of the options being there only for competition overclockers. The second submenu brings up the tweakable options of the Digi+ VRM, allowing the user to tweak sophisticated voltage, frequency, and current limit settings. The third submenu, “Internal CPU power management”, includes only options for the Intel SpeedStep and Turbo Mode features. There also is the “Tweaker’s Paradise” submenu and it includes advanced chipset voltage and frequency options. Finally, the last submenu in the Ai Tweaker menu is the “DRAM REF voltage control” and, as its name suggests, includes advanced voltage control options for the RAM modules.
The “Advanced” menu is a long list of submenus, each of which includes tweakable options specific to a subsystem of the motherboard. Some submenus initially look informative but reveal a wealth of options once the user scrolls down. The “Monitor” menu is another such example, as it initially appears to include only sensor readings, but scrolling down reveals several tweakable options and configuration submenus.
Software
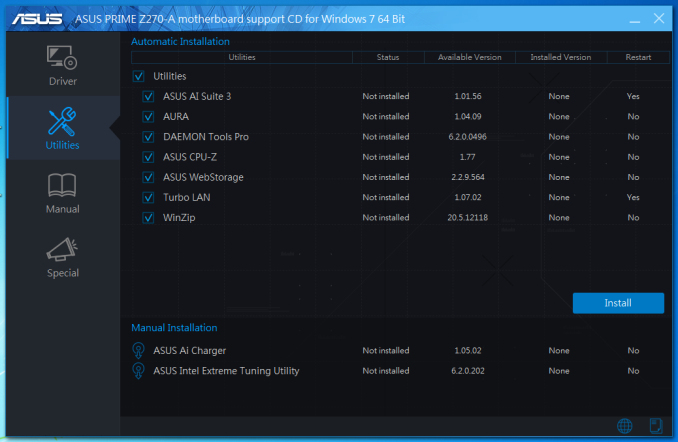
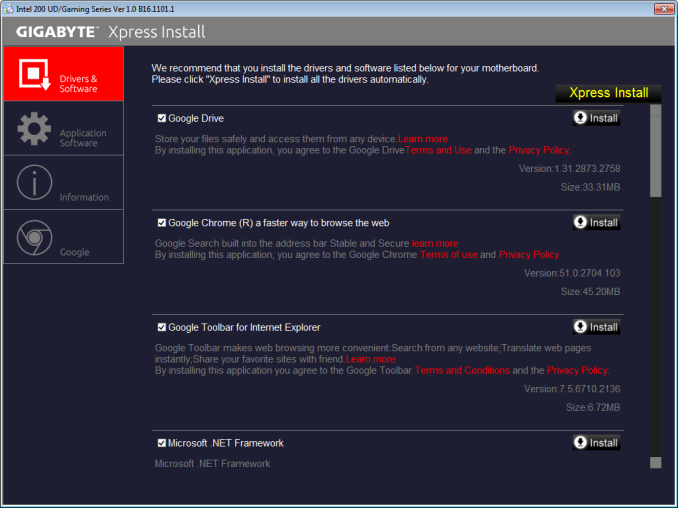
Users need to be a little extra careful with the included drivers DVD, as it also includes software that might not be to their liking. It appears that Asus went overboard with the promotion of Google’s (freeware) and Norton’s (trial) products, as they included them in the list of essential drivers, whereas these should be appearing in the utilities list. The “special” tab also promotes these two software packages and banners even come up during the installation.
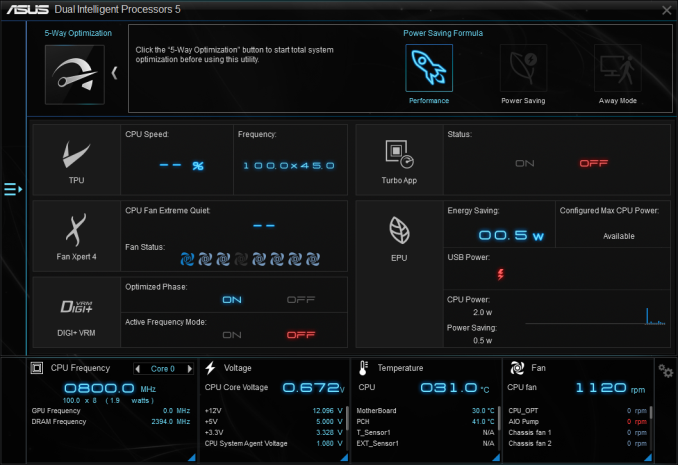
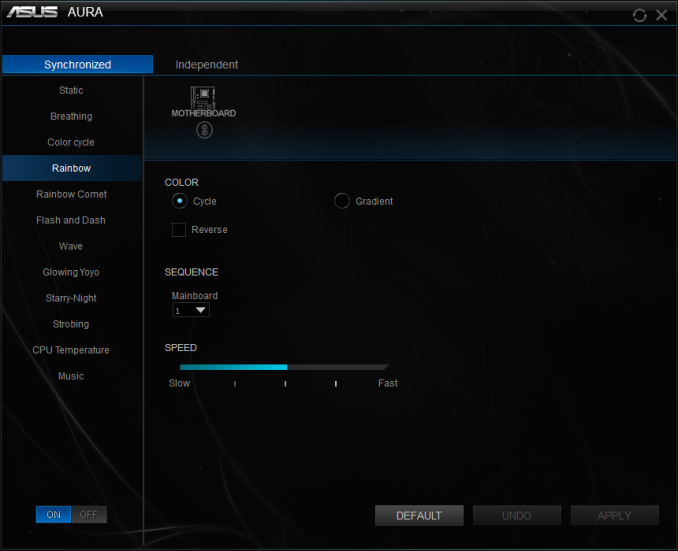
Asus is using two main software packages: AI Suite 3 and AURA. The former includes nearly all of the motherboard’s tweakable options, while the latter handles only the RGB lighting options. The rest of the utilities are simplistic applications, such as a version of the CPU-Z that has been modified to display the Asus logo.
As it includes all of the tweakable options, the AI Suite 3 has a complex UI with an overwhelming number of options. The display is divided into the main display (top) and the advanced options (bottom). The bottom part persists regardless of the display option that has been selected for the top screen. It defaults to multiple sensor readings but clicking on the cogwheel icon brings up threshold settings for every motherboard sensor.
The main display at the top has a side menu that offers access to many different screens, each with a large number of advanced settings. Most of the BIOS options are accessible via these screens, allowing the user to perform automated or advanced overclocking without having to enter the BIOS. There is also a BIOS update software.
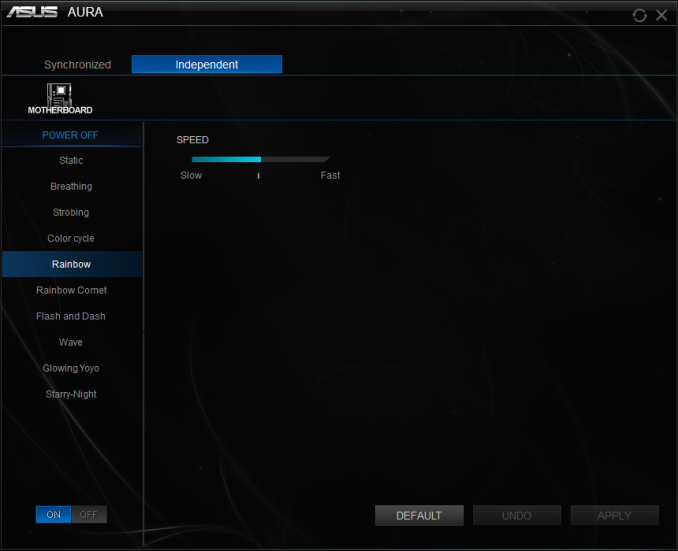
The Asus AURA software is flexible and allows for the programming of basic and advanced lighting effects independently for the motherboard itself and for the installed RGB LED strip (if available). There are several pre-programmed lighting effects and each can be individually tweaked, but the users cannot program effects of their own.
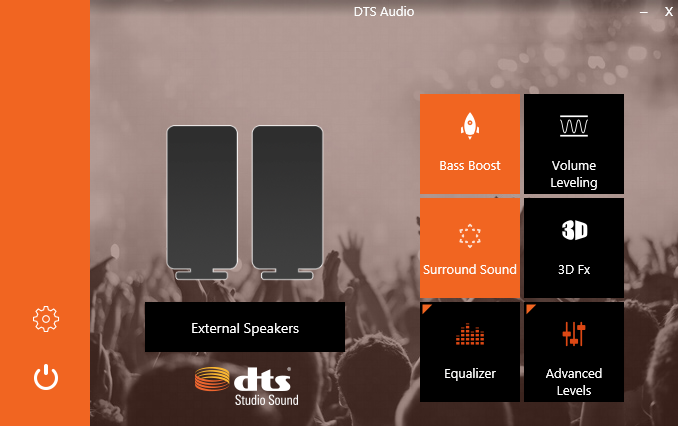
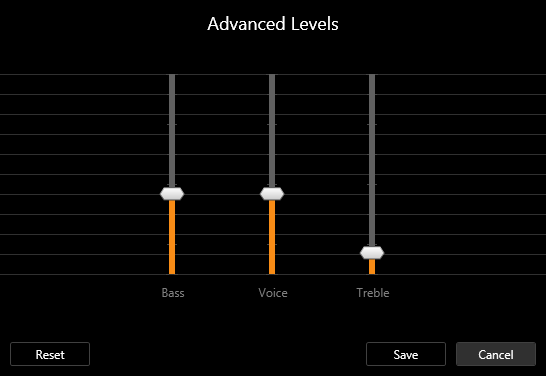
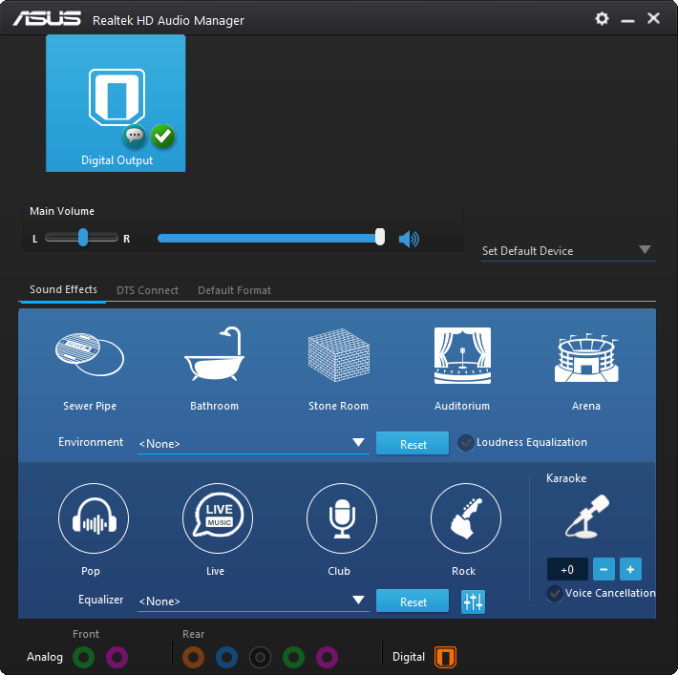
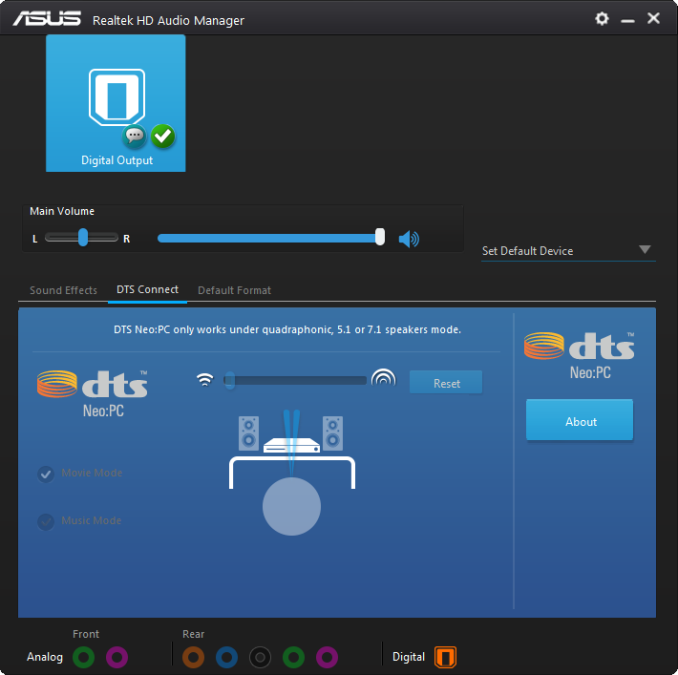
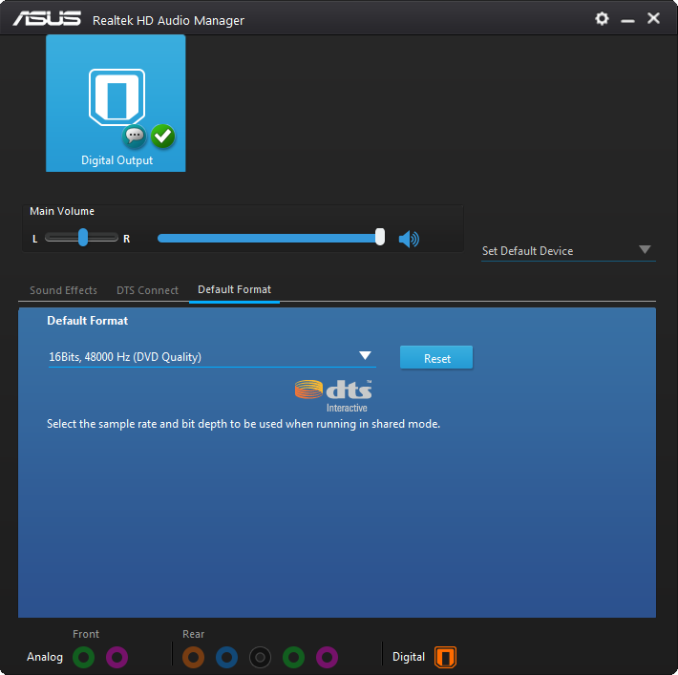
The audio software that accompanies the Prime Z270-A is a little confusing, as Asus includes two software packages that share some options. The Realtek HD audio manager is the primary software and features a typical format that includes sound effects, an equalizer, and DTS sound options. Asus however also includes the DTS audio software that also allows for the tweaking of some audio options. I feel that these two should be merged into one software package to avoid confusion.
GIGABYTE Z270X Ultra Gaming Board Features
GIGABYTE took a different approach than that of most manufacturers, and tried to implement features we would typically see on a more expensive product. The GIGABYTE Z270X Ultra Gaming features a native U.2 PCIe ×4 connector and SATA Express ports: both of which are storage interfaces that we rarely see implemented on sub-$170 motherboards that are targeted towards gamers. The GIGABYTE Z270X Ultra Gaming is using the Realtek ALC1220 audio codec and the Intel I219-V network adapter, both high quality and popular choices for mainstream gaming keyboards. A major upgrade over its predecessor, the Z170X Ultra Gaming, is the implementation of RGB lighting LEDs, including a header for an external RGBW LED strip. In order to keep the retail price competitive after the inclusion of all these features, GIGABYTE’s engineers had to make other compromises, as we will cover in the review.
| GIGABYTE GA-Z270X-Ultra Gaming | |
| Warranty Period | 3 Years |
| Product Page | Link |
| Price | $165 |
| Size | ATX |
| CPU Interface | LGA1151 |
| Chipset | Intel Z270 |
| Memory Slots (DDR4) | Four DDR4 Supporting 64GB Dual Channel Up to 4133 MHz |
| Memory Slots (DDR3L) | None |
| Video Outputs | HDMI 1.4 DVI-D |
| Network Connectivity | Intel I219-V |
| Onboard Audio | Realtek ALC1220 |
| PCIe Slots for Graphics (from CPU) | 2 x PCIe 3.0 (x16/x0, x8/x8) |
| PCIe Slots for Other (from PCH) | 3 x PCIe 3.0 x1 1 x PCIe 3.0 x16 (max x4 mode) |
| Onboard SATA | Six, RAID 0/1/5/10 |
| Onboard SATA Express | Two, RAID |
| Onboard M.2 | 1x PCIe 3.0 x4 or SATA, RAID 0/1, NVMe |
| Onboard U.2 | 1x PCIe 3.0 x4, RAID 0/1, NVMe |
| USB 3.1 | 1 x Type-A on back panel, ASMedia ASM2142 1 x Type-C on back panel, ASMedia ASM2142 |
| USB 3.0 | 4 x Rear Panel 4 via headers |
| USB 2.0 | 2 x Rear Panel 4 via headers |
| Power Connectors | 1 x 24-pin ATX 1 x 8-pin CPU |
| Fan Headers | 1 x CPU (4-pin) 1 x Pump (4-pin) 3 x CHA/SYS (4-pin) |
| IO Panel | 1 x Combination PS/2 2 x USB 2.0 4 x USB 3.0 (USB 3.1 Gen 1) 1 x USB 3.1 Type-A 1 x USB 3.1 Type-C 1 x Network RJ-45 1 x HDMI 1.4 1 x DVI-D 1 x Audio Jacks 1 x Optical SPDIF Out Port |
| Other Features | TPM Header Front Audio Header RGBW LED Connector Thunderbolt header |
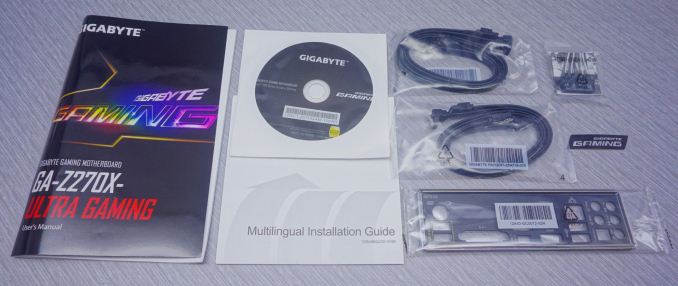
In The Box
We get the following:
- Driver Disk
- Manual
- Rear I/O Shield
- Four black SATA cables (two straight, two with a 90° connector)
- Case Badge
- “G” Connector
The GIGABYTE Z270X Ultra Gaming comes with a simple, straightforward bundle that consists of a typical manual (English only), a very basic but multilingual installation guide, a DVD with the necessary drivers and software, a typical I/O shield, a case badge, four SATA cables and a “G” connector. The G connector is a typical holder for the basic case front panel wires that allows the user to connect and disconnect them all at once. Strangely, GIGABYTE decided not supply an SLI bridge, which is a very peculiar choice for a gaming series motherboard.
Visual Inspection
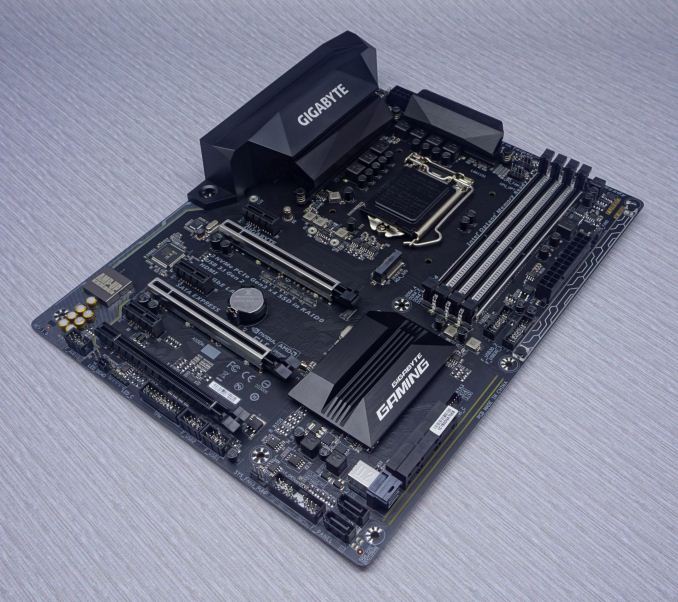
With the GIGABYTE Z270X Ultra Gaming, the company’s engineers had to design a motherboard that is both practical and also aesthetically appealing. A quick look on the motherboard had us thinking that they did an outstanding job overall. Almost all of the motherboard’s internal connector headers are across the bottom edge of the PCB, where the cables can be easily routed to with minimal practical and visual interference. The two USB 3.0 headers that have been cleverly placed next to the ATX connector, allowing the thicker cables to be routed alongside the ATX or PCIe power cables. The Thunderbolt card connector is right above the SATA Express connectors. There is no COM port header.
GIGABYTE implemented metal braces on the two PCIe 3.0 ×16 slots and on the RAM slots, minimizing the flexing of the motherboard that can be caused either by the use of excessive force during installation or by the installation of heavy hardware components. There is no metal brace on the third full-length PCIe ×16 slot (which runs at ×4 maximum), as the designers clearly expect that only lightweight devices will be installed there. The GIGABYTE Z270X Ultra Gaming has no onboard power/reset switches.
Aesthetically, the GIGABYTE Z270X Ultra Gaming is almost entirely black, with silver metal braces, CPU socket, and audio codec shielding. The heatsinks and the plastic rear I/O cover are black, with the company logo printed on the I/O cover and PCH heatsink. Overall, the design is clean and modern, with neutral colors, making it ideal for RGB lighting and multi-color lighting effects.
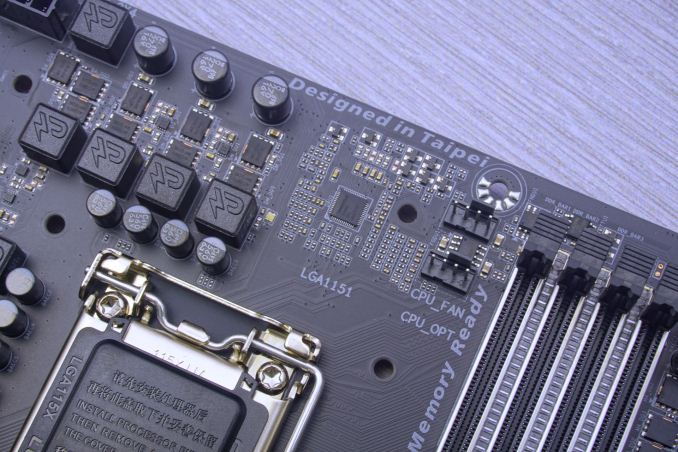
As we mentioned above, the GIGABYTE Z270X Ultra Gaming has nearly all of its internal headers placed across the bottom edge of the motherboard. This includes one fan header near the bottom right corner of the board. One more fan header can be found next to the ATX power plug at the top right corner of the motherboard, with two more between the CPU socket and the RAM slots. Finally, there is another fan header at the top left corner of the motherboard that can be easily missed, as it is right between the large plastic I/O shield and the 12V power connector. GIGABYTE advertises that all of the fan headers are “hybrid”, meaning that they can support any type of device (fans or pumps) and operate in either PWM or voltage control mode.
The expanded space between the two PCIe 3.0 ×16 slots allows better cooling of advanced GPU cards with tri-slot spacing, rather than aggressive dual-slot spacing. There is only once M.2 slot and it is near the CPU socket, meaning that access to it will almost certainly be blocked by larger coolers, requiring their removal in order to install/remove M.2 drives. Drives up to 110 mm long (22110 type) are supported. PCIe M.2 drives will not affect other devices but the use of an M.2 SATA drive will disable one of the SATA ports.
The U.2 port is near the bottom right corner of the motherboard and operates at PCIe 3.0 ×4 maximum. It does not share its bandwidth with any other devices. The third full-length PCIe slot from the chipset does share bandwidth: it can either operate at ×1 maximum without affecting any other devices, or go up to ×4 by disabling two of the PCIe ×1 slots. The two SATA Express connectors are right above the U.2 port and may be used as four typical SATA ports if no SATA Express devices are available.
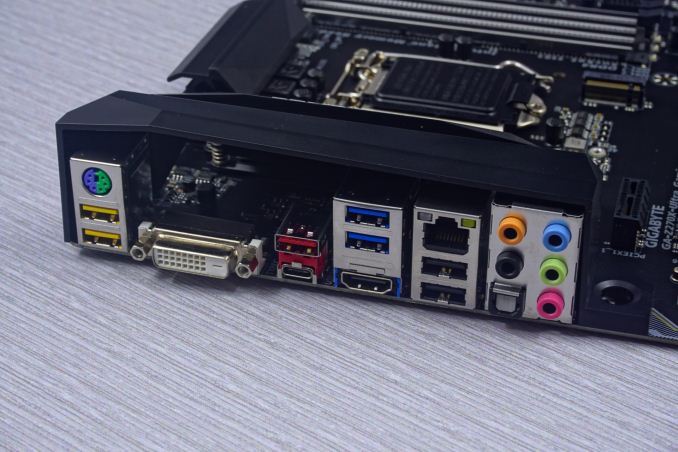
The rear I/O panel of the GIGABYTE Z270X Ultra Gaming is strangely colorful. Starting at the top, we can see a PS/2 combo port and two yellow USB ports. The yellow USB ports are USB 3.1 Gen 1 type. There is one DVI-D port and one HDMI 1.4a port, supporting a maximum resolution of 60Hz @ 1920x1200 and 24Hz @ 4096x2160 respectively. Note that this DVI-D port cannot support DVI to D-Sub adapters - it is digital only. We can also see one red USB 3.1 Gen 2 (Type A) port, with a black Type-C USB 3.1 Gen 2 port right next to it. Two blue USB 3.1 Gen 1 ports are next to the HDMI port and two black USB 2.0 ports share the same shielding with the LAN port. Finally, there are an optical SPDIF out port and five 3.5 mm analog audio jacks.
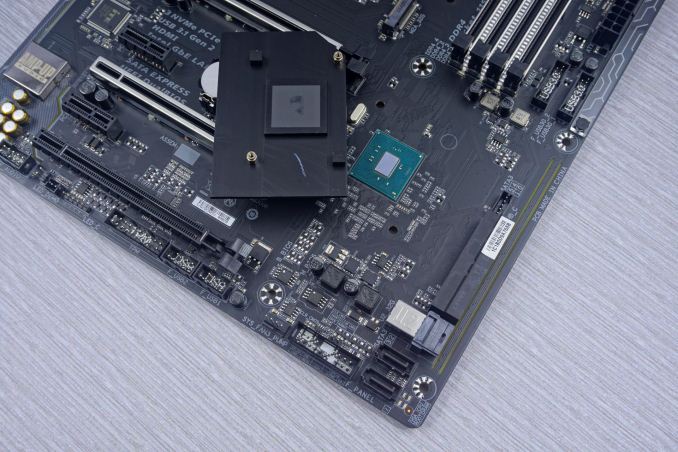
The removal of the chipset’s heatsinks revealed a frightfully bad contact with the core. These chipsets hardly need any cooling but this could impede the longevity and the overclocking capabilities of the motherboard. The VRM heatsinks were making much better contact with the components but the use of plastic clips and tension springs to support them is not very appealing.
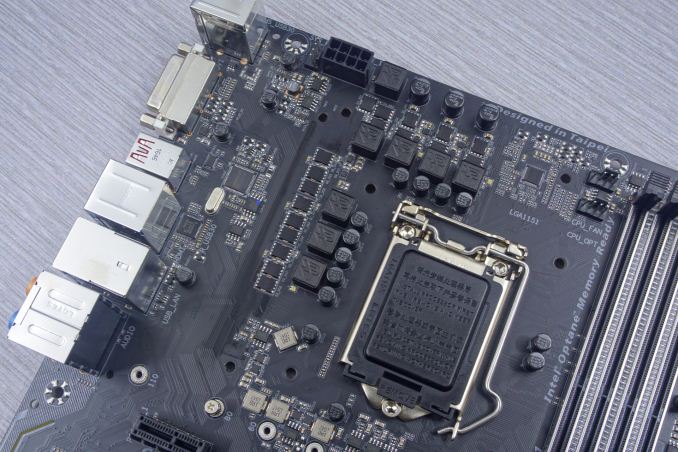
Nippon Chemi-Con appears to be the supplier for all of the polymer capacitors on the GIGABYTE Z270X Ultra Gaming. Their branding is clear on the small golden capacitors on the audio circuitry that have not been painted or rebranded by GIGABYTE. As for the black capacitors, the font perfectly matches the one that Nippon Chemi-Con is using and their logo clearly appears on the larger capacitors near the motherboard’s edge.
The VRM circuit on the GIGABYTE Z270X Ultra Gaming is a 7-phase design (4 + 3), which is the absolute minimum that we expect to see on a motherboard that supports overclocking. An Intersil 95866 dual output (4+3) phase controller takes care of the CPU power supply. The 4C06N and 4C10N MOSFETs are supplied by ON Semiconductor. Overall, this design is adequate for the typical user and for some limited overclocking, but it is unlikely to cope with heavy overclocking or provide the precision professional overclockers require. GIGABYTE has different boards for those users.
BIOS
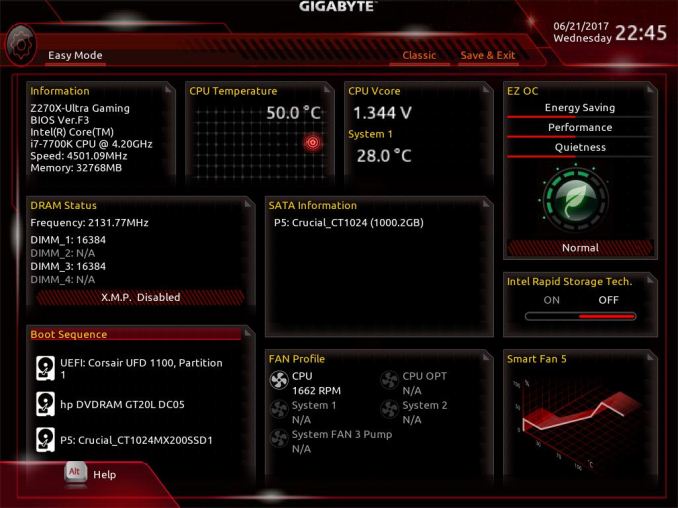
Like almost every modern motherboard, the GIGABYTE Z270X Ultra Gaming features a graphical UEFI BIOS that defaults to a simple, single page “easy mode”. This mode is generally informative and the user can only change the boot sequence, enable the RAM X.M.P. mode and/or the Intel Rapid Storage technology, and switch between a few pre-programmed overclocking/power saving modes. In order to access more options and features, the user needs to enter the “classic” mode.
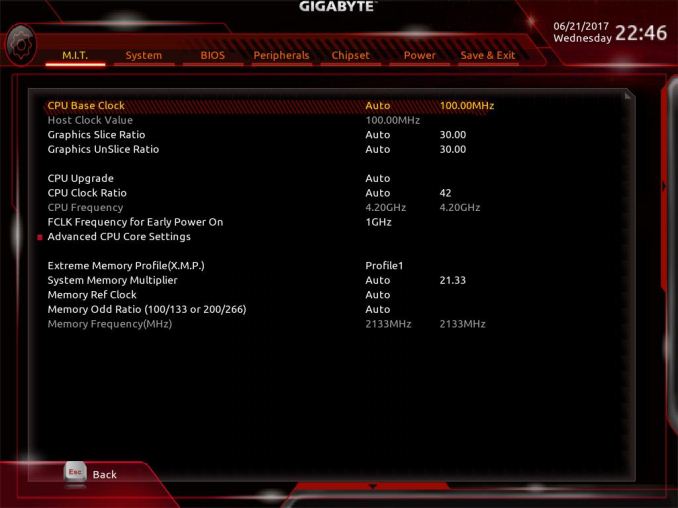
The "classic" (or advanced) mode reveals the entirety of the motherboard's capabilities and options, which are distributed into six main tabs. The first tab is the M.I.T., by far the most complex section of the BIOS, as it includes all of the frequency, memory and voltage settings of the motherboard. It has five main submenus, with more submenus hidden inside them.
The frequency submenu allows for the adjustment of the CPU and memory clocks and ratios, including FCLK. Strangely, there is both a manual control of the CPU's clock ratio and a "CPU upgrade" option, both of which are virtually doing the same exact thing. The only difference is that the CPU upgrade option brings out a drop-down menu that is listing the end frequency of the CPU, probably for users who are not aware that the CPU clock ratio multiplied by the base clock is the exact same thing. The maximum system memory multiplier is 41.33 (4133 MHz). A look inside the Advanced CPU Core settings submenu is enough to scare even veteran users, offering dozens of frequency and power settings for each specific part of the CPU, including power limiters and per-core turbo boost settings. By default, the GIGABYTE Z270X Ultra Gaming has the Intel Turbo Boost at 45x for the first core and at 44x for the other cores.
The Advanced Memory Settings submenu initially brings up only the most basic settings, which are the clock and its multiplier, the boot mode, automatic enhancement settings and basic voltage adjustments. If the memory timing mode is switched from Auto to Manual, the user will be able to change the four standard timing settings of the memory into the memory sub-timing submenu. If the "advanced manual" option is selected instead, the available number of tweakable timing settings explodes up to 42. The Advanced Voltage Settings option brings up four other submenus, namely the Advanced Power Settings, the CPU Core Voltage Control, the Chipset Voltage Control and the DRAM Voltage Control. Each submenu offers a wide range of adjustments for the respective components and their subcomponents. The PC Health submenu is a little poor, monitoring only the absolute basic voltage lines of the motherboard and missing even the PCH voltage.
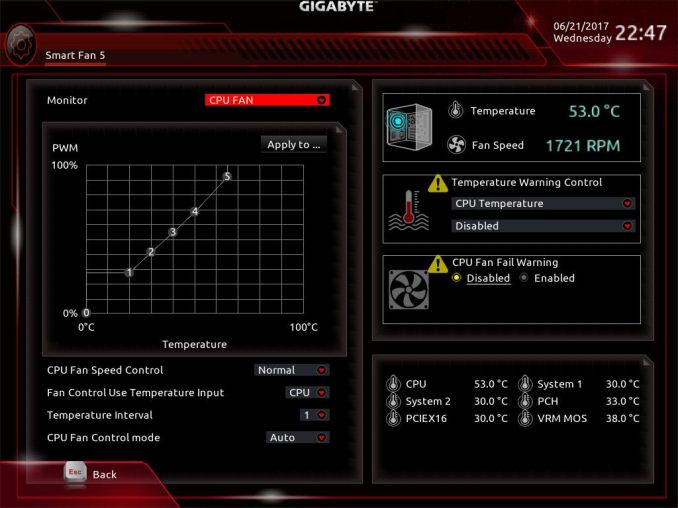
The Smart Fan 5 is more of an application than a submenu item, bringing up a graphic interface for the monitoring and adjustment of the fans that are connected to the onboard headers. There are three preset options, "Normal", "Silent" and "Full Speed", as well as manual control that allows the user to adjust the speed of each device according to a specific system temperature.
After the M.I.T. menus and submenus, the rest of the options in the BIOS are relatively basic. The “System” menu is mostly informative and the only adjustable option is the system’s language. The “BIOS” section includes the boot and security options, as well as a setting for the mouse's speed while in the BIOS. The “Peripherals” menu and its submenus allow for the monitoring and control of the connected devices and ports, while the “Chipset” menu allows for the control of the onboard devices. Finally, the “Power” menu includes settings for the power management of the system, as well as sleep/wake options.
Software
GIGABYTE’s DVD includes the necessary drivers alongside with Google software. The user can “Xpress Install” the selected drivers and software. This option will automatically install the selected software packages and reboot the system as many times as necessary without any user supervision.
The “Application Software” tab can be used to install the GIGABYTE App Center or the included OEM antivirus software. The user can also choose which applications of the App Center he or she wishes to install.
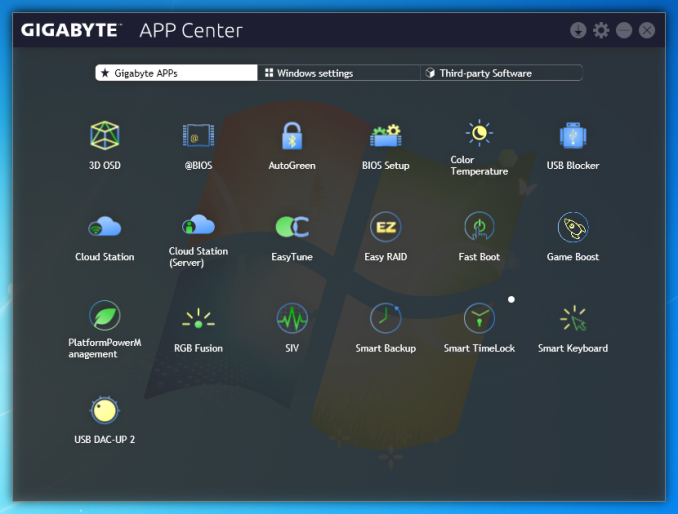
Launching the App Center brings up an interface with "Apps", icons that launch software packages designed for a specific purpose. Skipping the very obvious selections, the most complex of these "Apps" are the 3D OSD, the EasyTune, the Smart Keyboard and the RGB Fusion.
The 3D OSD is an option that projects information about the system onto the screen via a hotkey or while gaming. The list of the possible options to be shown is very long, including even the VBIOS version. If you would like to keep an eye on a certain temperature, watch your FPS or show your driver's version onto a screenshot, the 3D OSD can be rather useful. The text's size, color, and position can be adjusted and the application can be set to automatically launch alongside certain games.
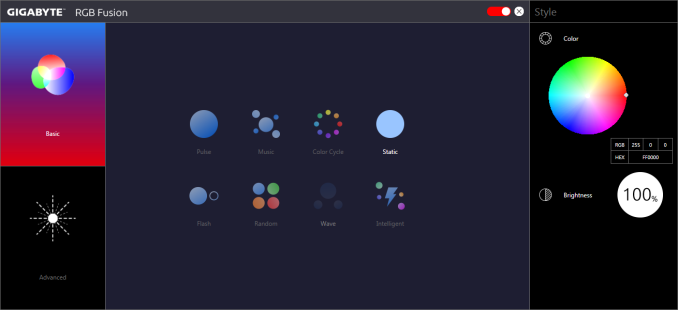
The RGB Fusion application is for the programming of the onboard and external RGB lighting. Note that the programming is by default synchronized, but the user can also separate the onboard RGB color/effects from those of the connected RGBW strip (if applicable). There is a wealth of pre-programmed options and effects, as well as a limited editor for the creation of unique effects.
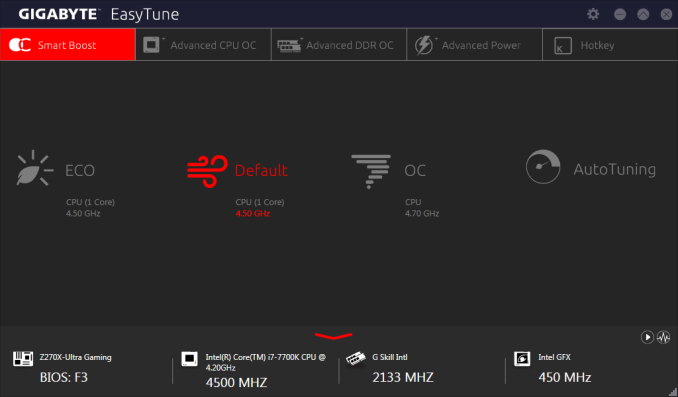
The EasyTune is the App that allows for in-OS monitoring, overclocking and tweaking, making it possible to easily adjust system options without having to reboot into the BIOS. The number of options is not as extended as it is in the BIOS, but the included options are more than sufficient for the majority of overclockers. Hotkeys can be set to switch between two profiles, such as, for example, a low-energy and a gaming profile.
The Smart Keyboard allows the reprogramming of the F1-F12 keys to initiate macros, launch applications and enter Sniper mouse mode. The Macro programming is basic and can be greatly improved, but it allows for the insertion of absolute mouse coordinates and clicks as well. If you do not own a programmable keyboard, this piece of software can become pretty useful in certain games and especially MMOs. It is a shame that it cannot be used to program keys outside the F1-F12 range.
The strangest option is the "Color Temperature", or "Blue-Light Killer". This is supposed to reduce the blue spectrum light of the LED display to increase comfort and protect your eyesight. The only issue here is that it (obviously) greatly affects the color profile of the system, making all colors warmer. At its maximum setting, the entirety of the screen is virtually orange. We cannot see who would enjoy using a setting that, even at its lowest possible setting, distorts the system's color output.
Another interesting option is the "Smart TimeLock", an option that allows the system's builder to limit every user's allowed time during the weekdays and weekends. If you want your children to hate you by forcing system shutdowns while they play MMOs, these are the settings you are looking for.
Test Bed and Setup
Readers of our motherboard review section will have noted the trend in modern motherboards to implement a form of MultiCore Enhancement / Acceleration / Turbo (read our report here) on their motherboards. This does several things, including better benchmark results at stock settings (not entirely needed if overclocking is an end-user goal) at the expense of heat and temperature. It also gives in essence an automatic overclock which may be against what the user wants. Our testing methodology is ‘out-of-the-box’, with the latest public BIOS installed and XMP enabled, and thus subject to the whims of this feature. It is ultimately up to the motherboard manufacturer to take this risk – and manufacturers taking risks in the setup is something they do on every product (think C-state settings, USB priority, DPC Latency / monitoring priority, overriding memory sub-timings at JEDEC). Processor speed change is part of that risk, and ultimately if no overclocking is planned, some motherboards will affect how fast that shiny new processor goes and can be an important factor in the system build.
For reference, both the Asus Prime Z270-A and the GIGABYTE Z270X-Ultra Gaming had multi-core acceleration enabled by default. We tested the Asus Prime Z270-A with the 0604 BIOS and the GIGABYTE Z270X-Ultra Gaming with the F6 BIOS.
| Test Setup | |
| Processor | Intel Core i7-7700K (ES, Retail Stepping), 91W, $340 4 Cores, 8 Threads, 4.2 GHz (4.5 GHz Turbo) |
| Motherboards | Asus Prime Z270-A GIGABYTE GA-Z270X-Ultra Gaming |
| Cooling | Alphacool Eisbaer 240 |
| Power Supply | Corsair AX1200i Platinum PSU |
| Memory | G.Skill DDR4-2400 C15 2x16 GB 1.2V |
| Memory Settings | XMP @ 2400 |
| Video Cards | MSI GTX 770 Lightning 2GB (1150/1202 Boost) |
| Hard Drive | Crucial MX200 1TB |
| Case | Open Test Bed |
| Operating System | Windows 7 64-bit SP1 |
Many thanks to Alphacool, Corsair, G.Skill, MSI and Crucial for contributing to our test bed.
System Performance
Not all motherboards are created equal. On the face of it, they should all perform the same and differ only in the functionality they provide - however this is not the case. The obvious pointers are power consumption, but also the ability for the manufacturer to optimize USB speed, audio quality (based on audio codec), POST time and latency. This can come down to manufacturing process and prowess, so these are tested.
Power Consumption
Power consumption was tested on the system while in a single MSI GTX 770 Lightning GPU configuration with a wall meter connected to the Corsair AX1200i power supply. This power supply is Platinum rated, and as I am on a 230-240 V supply, leads to ~75% efficiency > 50W, and 90%+ efficiency at 250W, suitable for both idle and multi-GPU loading. This method of power reading allows us to compare the power management of the UEFI and the board to supply components with power under load, and includes typical PSU losses due to efficiency. These are the real world values that consumers may expect from a typical system (minus the monitor) using this motherboard.


Peculiarly, there is a significant difference in the power consumption between the two motherboards. The power consumption of the Asus Prime Z270-A is relatively high for a Z270-based board with a Kaby Lake CPU, but the culprit behind the slightly elevated consumption figures clearly is the onboard lighting, as the energy consumption figures drop by nearly 10 Watts once the lighting is turned off, giving the values above. GIGABYTE’s Z270X-Ultra Gaming displayed highly elevated energy consumption readings, surpassing even those of most previous generation motherboards that we have tested. Disabling the lighting did not bring the consumption down near to that of the other motherboards and no components were getting abnormally hot to justify the consumption as efficiency losses, suggesting that the high consumption may be due to a software/BIOS power management error.
Non UEFI POST Time
Different motherboards have different POST sequences before an operating system is initialized. A lot of this is dependent on the board itself, and POST boot time is determined by the controllers on board (and the sequence of how those extras are organized). As part of our testing, we look at the POST Boot Time using a stopwatch. This is the time from pressing the ON button on the computer to when Windows starts loading. (We discount Windows loading as it is highly variable given Windows specific features.)
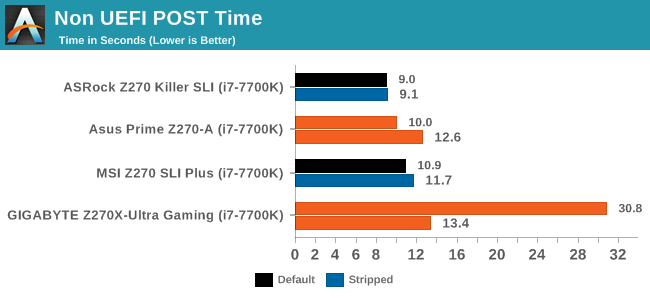
The default boot time of both the Asus Prime Z270-A and the GIGABYTE Z270X-Ultra Gaming is very good, with 12.6 seconds for the former and 13.4 seconds for the latter. With the fast boot option enabled, the Asus Prime Z270-A goes past the boot process in 10 seconds flat. Fast boot again does not work for GIGABYTE, as the enabling fast boot on the Z270X-Ultra Gaming is having the same effect that it does on most modern GIGABYTE motherboards - it multiplies the boot time instead of reducing it.
Rightmark Audio Analyzer 6.2.5
Rightmark:AA indicates how well the sound system is built and isolated from electrical interference (either internally or externally). For this test we connect the Line Out to the Line In using a short six inch 3.5mm to 3.5mm high-quality jack, turn the OS speaker volume to 100%, and run the Rightmark default test suite at 192 kHz, 24-bit. The OS is tuned to 192 kHz/24-bit input and output, and the Line-In volume is adjusted until we have the best RMAA value in the mini-pretest. We look specifically at the Dynamic Range of the audio codec used on board, as well as the Total Harmonic Distortion + Noise.


We expected to see good audio performance figures from both of the motherboards that we are testing today, as both are making use of the new Realtek ALC1220 codec (or ASUS's variant, the ALC1220A). The GIGABYTE Z270X-Ultra Gaming displayed exceptional performance figures, massively outperforming its Z170-based predecessor, with the dynamic range reaching 104.2 dB(A) and THD + Noise hitting -88.1 dB(A). The performance figures of the Asus Prime Z270-A are even better, with the motherboard displaying the best onboard audio performance that we have seen until today.
USB Backup
For this benchmark, we transfer a set size of files from the SSD to the USB drive using DiskBench, which monitors the time taken to transfer. The files transferred are a 1.52 GB set of 2867 files across 320 folders – 95% of these files are small typical website files, and the rest (90% of the size) are small 30 second HD videos. In an update to pre-Z87 testing, we also run MaxCPU to load up one of the threads during the test which improves general performance up to 15% by causing all the internal pathways to run at full speed.
Due to the introduction of USB 3.1, as of June 2015, we are adjusting our test to use a dual mSATA USB 3.1 Type-C device which should be capable of saturating both USB 3.0 and USB 3.1 connections. We still use the same data set as before, but now use the new device. Results are shown as seconds taken to complete the data transfer.
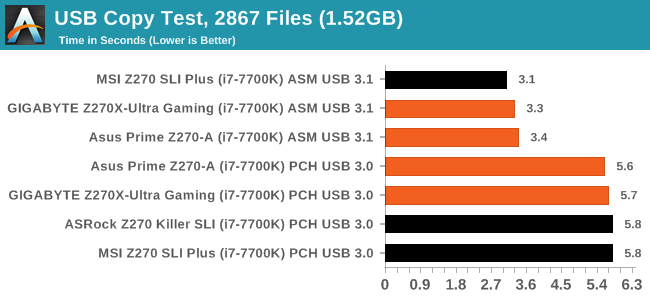
The new ASMedia 2142 controller works wonders on both of the motherboards that we are testing today, with a copy time of 3.4 and 3.3 seconds for the Asus Prime Z270-A and the GIGABYTE Z270X-Ultra Gaming respectively. Attaching the drive to a USB 3.1 Gen 1 (USB 3.0 PCH) port brings the copy time up to 5.6/5.7 seconds, which are the expected figures for the capabilities of this interface.
DPC Latency
Deferred Procedure Call latency is a way in which Windows handles interrupt servicing. In order to wait for a processor to acknowledge the request, the system will queue all interrupt requests by priority. Critical interrupts will be handled as soon as possible, whereas lesser priority requests such as audio will be further down the line. If the audio device requires data, it will have to wait until the request is processed before the buffer is filled.
If the device drivers of higher priority components in a system are poorly implemented, this can cause delays in request scheduling and process time. This can lead to an empty audio buffer and characteristic audible pauses, pops, and clicks. The DPC latency checker measures how much time is taken processing DPCs from driver invocation. The lower the value will result in better audio transfer at smaller buffer sizes. Results are measured in microseconds.

Asus usually takes DPC latency very, very seriously and the Prime Z270-A is no exception, with the maximum reading being just 43 μs. GIGABYTE used to have problems here but the Z270X-Ultra Gaming performed very well, with the maximum latency reaching 161 μs, a good figure for a modern gaming motherboard. Usually anything above 200 μs throws up a flag or two.
CPU Performance, Short Form
For our motherboard reviews, we use our short form testing method. These tests usually focus on if a motherboard is using MultiCore Turbo (the feature used to have maximum turbo on at all times, giving a frequency advantage), or if there are slight gains to be had from tweaking the firmware. We leave the BIOS settings at default and memory at JEDEC (DDR4-2133 C15) for these tests, making it very easy to see which motherboards have MCT enabled by default. For most of the motherboards in this test, our CPU testing becomes an indicator if any issues exist.
Video Conversion – Handbrake v0.9.9: link
Handbrake is a media conversion tool that was initially designed to help DVD ISOs and Video CDs into more common video formats. For HandBrake, we take two videos (a 2h20 640x266 DVD rip and a 10min double UHD 3840x4320 animation short) and convert them to x264 format in an MP4 container. Results are given in terms of the frames per second processed, and HandBrake uses as many threads as possible.


Compression – WinRAR 5.0.1: link
Our WinRAR test from 2013 is updated to the latest version of WinRAR at the start of 2014. We compress a set of 2867 files across 320 folders totaling 1.52 GB in size – 95% of these files are small typical website files, and the rest (90% of the size) are small 30 second 720p videos.

Point Calculations – 3D Movement Algorithm Test: link
3DPM is a self-penned benchmark, taking basic 3D movement algorithms used in Brownian Motion simulations and testing them for speed. High floating point performance, MHz and IPC wins in the single thread version, whereas the multithread version has to handle the threads and loves more cores. For a brief explanation of the platform agnostic coding behind this benchmark, see my forum post here.


Rendering – POV-Ray 3.7: link
The Persistence of Vision Ray Tracer, or POV-Ray, is a freeware package for as the name suggests, ray tracing. It is a pure renderer, rather than modeling software, but the latest beta version contains a handy benchmark for stressing all processing threads on a platform. We have been using this test in motherboard reviews to test memory stability at various CPU speeds to good effect – if it passes the test, the IMC in the CPU is stable for a given CPU speed. As a CPU test, it runs for approximately 2-3 minutes on high end platforms.

Synthetic – 7-Zip 9.2: link
As an open source compression tool, 7-Zip is a popular tool for making sets of files easier to handle and transfer. The software offers up its own benchmark, to which we report the result.

Gaming Performance
The issue of FCLK settings might play a big role here. At launch, the default setting for the communication buffer between the CPU and PCIe stack was 800 MHz, even though Intel suggested 1000 MHz, but this was because of firmware limitations from Intel. Since then, there is firmware to enable 1000 MHz, and most motherboard manufacturers have this - but it is unclear if the motherboard will default to 1000 MHz and it might vary from BIOS version to BIOS version. As we test at default settings, our numbers are only ever snapshots in time, but it leads to some interesting differences in discrete GPU performance.
(A side note from Ian: This is one of E. Fylladitakis first motherboard reviews and we supplied him with a single GPU to get started. This may change in the future. But ultimately the gaming tests have been more of a checkbox for abnormal behaviour, as with the CPU tests, to make sure nothing fishy is going on.)
Total War: Attila
The Total War franchise moves on to Attila, another The Creative Assembly development, and is a stand-alone strategy title set in 395AD where the main storyline lets the gamer take control of the leader of the Huns in order to conquer parts of the world. Graphically the game can render hundreds/thousands of units on screen at once, all with their individual actions and can put some of the big cards to task.
For low-end graphics, we test at 720p with performance settings, recording the average frame rate. With mid and high range graphics, we test at 1080p with the quality setting. In both circumstances, unlimited video memory is enabled and the in-game scripted benchmark is used.

GRID: Autosport
No graphics tests are complete without some input from Codemasters and the EGO engine, which means for this round of testing we point towards GRID: Autosport, the next iteration in the GRID and racing genre. As with our previous racing testing, each update to the engine aims to add in effects, reflections, detail, and realism, with Codemasters making ‘authenticity’ a main focal point for this version.
GRID’s benchmark mode is very flexible and, as a result, we created a test race using a shortened version of the Red Bull Ring with twelve cars doing two laps. The car is focus starts last and is quite fast, but usually finishes second or third. For low-end graphics, we test at 1080p medium settings, whereas mid and high-end graphics get the full 1080p maximum. Both the average and minimum frame rates are recorded.


Conclusion
Although both the Asus Prime Z270-A and the GIGABYTE Z270X-Ultra Gaming are similarly priced and targeted towards the same group of users, and even if both motherboards are sharing virtually the same subsystems, the approach that each manufacturer took is significantly different. Asus stuck with the features that benefit from high adoption rates, inserting two M.2 PCIe ×4 slots, with the third full-length PCIe slot being an additional high-speed storage device option. For the average gamer, the simultaneous support of two M.2 PCIe ×4 and six SATA drives probably is more than enough. GIGABYTE prioritized storage options and their performance, inserting a native U.2 PCIe ×4 and SATA Express ports that share no bandwidth with other devices, as well as a single M.2 slot. The third full-length PCIe slot can support an additional high-performance storage device, disabling two PCIe ×1 slots in the process, which will not affect the maximum number of storage devices that the motherboard can simultaneously support.
Both of the motherboards are sharing the same main primary subsystems. Both use the ASMedia 2142 controller, which provides one Type-A and one Type-C USB 3.1 Gen 2 port. Both boards use one Intel I219-V chip to provide a single RJ45 ethernet connection, and both use Realtek for the audio with an ALC1220/ALC1220A codec. All of these subsystems perform admirably, with the ALC1220 being a particularly good choice for a gaming-oriented motherboard. Asus placed a lot of effort on their implementation of the audio codec and the result was one of the best audio performance results that we have seen to this date, yet GIGABYTE does not fall far behind. As for CPU and gaming performance, we faced no issues with either of the motherboards that we reviewed here today. The overall CPU and gaming performance was almost identical during our testing, as both boards implemented Multi-Core Turbo by default.
GIGABYTE made the most out of the USB controllers, implementing a maximum of eight USB 3.1 Gen 1 (four internal and four at the back panel) and six USB 2.0/1.1 ports (four internal and two at the back panel). The Prime Z270-A respectively has six USB 3.1 Gen 1 (two internal and four at the back panel) and six USB 2.0/1.1 ports (internal headers only). Asus forgoes the USB 2.0 ports at the back panel, which should not be an issue considering that the USB 3.1 Gen 1 (USB 3.0) design requires it to be fully compatible with USB 2.0 devices. However, compatibility problems between old USB 2.0/1.1 devices and new USB 3.0/3.1 controllers are an uncommon, yet existent issue, with devices that are using RS-232 converters being the most frequent culprits. Both motherboards have an onboard Thunderbolt header. What the GIGABYTE Z270X-Ultra Gaming is lacking in comparison to the Asus Prime Z270-A is a COM header, which may be unimportant on a gaming motherboard, yet it could be a deterrent for certain users.
Aesthetics are a subjective matter and it falls upon each individual user to decide whether Asus’s design is too extravagant or GIGABYTE’s design is too dull. As far as RGB implementation goes, GIGABYTE took a more careful approach, with the inclusion of an RGBW/-UV header and a slightly more sophisticated application. This header can support regular RGB strips, RGBW strips (with extra white LEDs) or RGB/UV strips (with extra UV LEDs). The header on the Asus Prime Z270-A can support only RGB strips. The app for Asus’s RGB application, AURA, can sync lighting effects between all devices that support it (e.g. keyboards, DRAM and GPUs). The GIGABYTE RGB Fusion application is more flexible in terms of programming and control, and can also sync lighting effects between all devices supported by the RGB Fusion application.
We should not forget to mention that both of these motherboards feature 3D printing support, which is something of a trend lately. GIGABYTE’s approach on this is very rudimentary, offering 3D files and support only for the replacement of the LED overlay that lies across the right side of the motherboard. Asus took this quite more seriously and they are offering files for M.2 drive fan mounts, SLI bridge and cable covers, fan grills and cable combs. These files are editable of course, allowing users to perform modifications should they wish to do so. With 3D printers becoming more popular and affordable as time goes by, it would definitely be interesting to see more such ideas and options being implemented in the future.
Finally, when compared in terms of quality, both motherboards are up to task. GIGABYTE may have a slight psychological advantage here, as the Nippon Chemi-Con capacitors that the Z270X-Ultra Gaming is using are more popular than the Nichicon FPCAP capacitors found on the Asus Prime Z270-A. Both of these are top quality capacitor suppliers and the polymer products on both motherboards should easily last a decade, greatly surpassing the longevity of other parts. As both manufacturers also offer the same warranty length and terms, we ought to consider the comparison in terms of quality to be a tie. Where the Asus Prime Z270-A has an immense advantage is on the power delivery circuitry, which is significantly superior to what GIGABYTE implemented on the Z270X-Ultra Gaming, making the Prime Z270-A a far more appealing option for users who might look into heavier overclocking. GIGABYTE is mainly placing their faith on the native U.2 and SATA Express support, technologies that currently are not popular in the market, but still many users that do not upgrade or build new systems often may opt to have them just in case they gain traction in the future.

